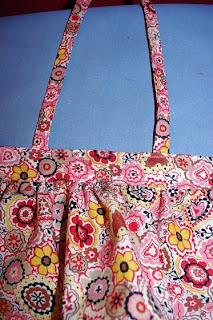
RJ is getting another Build-A-Bear for Christmas (shhhh, don't tell her!). This time it is a bunny! However, rather than buying clothes for the bunny, I wanted to make her a dress. So I did! I had an idea in my mind and it turned out just like I pictured! Don't you love when that happens?! And since I love to give, I am going to give you the pattern and instructions on how to make this simple halter sundress for any 18" bear, Build-A-Bear or not, for free! This is really very simple to make, requiring only straight stitching and very little time. I actually made this entire thing in front of the girls but they had no idea what I was making! :)
 Free Sewing Pattern for 18" Build-A-Bear - Halter SundressSupplies Needed:
1 - 18"x4" rectangle of fabric
1 - 36"x6" rectangle of fabric
2 - 9"x2" rectangles of fabric
36" piece of lace
1" piece of Velcro
matching thread
sewing machine
iron
pins, scissors, etc.
1. Take your 18"x4" rectangle and fold it in half lengthwise, wrong sides together. Press. You now have an 18"x2" rectangle. Open the folds you just made. Take the raw lengthwise edges (the 18" sides) and fold them in 3/4"; press.

On the ends (the 4" ends) fold in 1/2"; press. Fold your rectangle in the middle again (the very first fold you made) and you now have a rectangle about 1 1/4" wide by 17" long; press well. We will refer to this piece as the band. Set it aside.

2. Take your 36"x6" piece and turn under a 1/4" on the bottom 36" edge. Press. Turn under 1/4" again; press. Stitch. You have just made the hem at the bottom of the dress. We will refer to this piece as the skirt. On each of the 6" sides, fold under 1/2"; press. Fold under 1/2" again; press again. Stitch.

On the raw top 36" edge, sew a gathering stitch along the top of the piece, close to the edge. If you don't have a gathering stitch, set your stitch length to long then make two rows of stitching close to the edge. Make sure the rows do not cross over each other. Gently pull up the bobbin thread on these two stitch lines you just made. You will gather this edge of the skirt. Gather until it matches the length of the band you previously made.

3. Once you have the skirt gathered, you will attach it to your band. Place your band with the open long edge at the bottom and the folded long edge at the top. Take your gathered skirt and place it inside the band, a bit more than 1/4" in. Pin in place. Stitch across the band catching the skirt as you go. Once you have finished that first row of stitching, do another row right close to the first row you just made. Then stitch close to the upper edge of the band, across the whole band. You should now have the band and the skirt attached to each other.

You are getting close to being done! Take the 36" piece of lace and attach it to the bottom of the skirt. If you do not want to use lace, I would make the skirt about 1" longer.

4. Take your 2 - 9"x2" rectangles and fold them in half lengthwise, wrong sides together. Press. Open up the fold. Fold the long 9" raw edges in until they meet in the middle; press.

Take the short 2" ends and fold in 1/2"; press. Fold the rectangle in the middle again so that your finished size is 8"x1". These are your straps.
5. Take your dress and fold it in half to find the midway point. Place a pin here on the band to show you the middle. Measure 1 1/2" out on both sides from this middle point and mark with a pin again. These second pin marks are where you will place your straps. Sew your straps in place. They will tie in a knot behind the bear's head after you put the dress on the bear.

6. Take your piece of velcro and sew it on the back of the dress, where the ends of the band would meet.

7. Add any embellishments to the dress as desired.
8. YOU ARE DONE! Congratulations! Obviously this can be modified to make a sundress with spaghetti straps instead of halter straps or shorten the dress and omit the straps and you have yourself a skirt. I am sure that little girl will enjoy this dress on her bear just as much as you enjoyed making it. If anything is unclear or needs further clarification, please let me know!


Thank you for this tutorial! My daughter got her first build-a-bear yesterday and the bunny needs a seersucker dress (it's a family thing). Since build-a-bear doesn't make any, I guess that means I have to. I'll let you know how it turns out!
ReplyDeleteI just finished making this dress using your tutorial. It was easy to follow and the dress turned out great!! I plan to make more. Thanks
ReplyDelete