Showing posts with label sewing. Show all posts

Thursday, November 17, 2011

Christmas Aprons


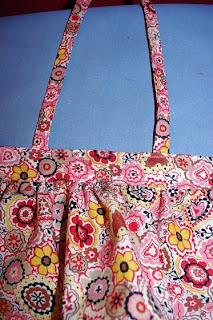
Someone suggested to me I should sew some Christmas aprons - so I did!  I am not into the cutesy Christmas fabric choosing, instead, the beautiful classics that remain timeless.  I found some gorgeous fabric and was able to create a couple of really elegant aprons.  These are not your traditional quickly-sewn looking-a-bit-boring Christmas aprons.  These are filled with details typically seen on skirts, with the darts and pleats, but they are worthy of the beauty of the fabric and I am thrilled with the results.


This first one is a new style for me.  I call this the "Ali Apron".  I remember sketching this out many months ago and I finally made it into reality.


The box pleats at the bottom of the apron were quick to make, thanks to a little pleat tool I found at the thrift store about a year ago.  I found it again recently (my "sewing room" is a disaster!) and it makes quick work of making any type of pleats - no measuring required.


I knew I wanted to accent the apron with a large fabric flower so I did - it adds such a charming flair!

With all these details, this is most certainly not your get-down-and-dirty-in-the-kitchen kind of apron but a I-am-the-hostess-of-a-great-Christmas-party-and-I-want-to-look-great-while-keeping-clean kind of apron.


The second one I made was made in the Anne Apron style, with the pleated skirt.  This is probably my favorite type of apron to make (at least it was - with each additional apron I make, that opinion is possibly changing).  I love the elegance of it and how it actually looks more like a skirt than an apron. 

Once again, the classic Christmas colors of red, white, green and gold are so beautiful and this style of apron really showcases it.  The bolder fabric stands out while the more muted red and gold is a nice surprise under the pleats.


With the extra long tie, this apron can be tied in the front or the back.


I am going to be selling my aprons at a craft show here this weekend so we will see how it goes.  Regardless, I think I may have to buy some more Christmas fabric but I just might wait until it goes on sale in a little while!  Do you have a Christmas apron?  What kind of Christmas fabric appeals most to you?

** The very best part about sewing these aprons was that I could do the whole thing on my new-to-me 1954 Elna Supermatic sewing machine, gifted to me by my grandmother.  My new Brother sewing machine grumbles incessantly when sewing through anything thicker than 2 layers of cotton.  This machine, while sewing through 5 layers of fabric to attach the box pleats, didn't so much as hesitate.  It was a wondrous sewing experience!  I am smitten with my new machine! **

Sharing with:


Photobucket

Tuesday, September 13, 2011

Tie-One-On Bib (Perfect for that Little Man!)

I found this fantastic green plaid fabric at the local MCC and there is yards of it!  I knew immediatly it would make perfect bibs for the moms at the Crisis Pregnancy Center!  I just had to think of a way to make the bib say "boy" so I did a little internet searching and came up with this!  The bib is completely reversible with the other side being all green plaid to match the tie.


Perfect? No!  But perfectly adorable!

Thursday, August 11, 2011

My Birthday Princess & Clothes for 18 Inch Dolls

This past week we celebrated (minus daddy who was dealing with a major catastrophe at work but with Nana) the 4th birthday of my princess Ali!  What a little bundle of sweetness she is (with a whole bunch of attitude thrown in!).  Ali is my snuggler.  She LOVES to snuggle and cannot get enough.  If she is upset, snuggle with her and her baby, read her a book and she relaxes immediately.  She loves music and dance and is absorbed with watching herself in the mirror!  It is hilarious to watch her watch herself sing and dance!  She is the least adventurous of the bunch preferring to stay close to mom and dad.  She is a momma's girl, that is for sure!  She has learned lately the art of crossing her arms when upset and pouting a big pout.  Though it is very cute, it is certainly not appropriate.  She wants so much to be a big girl but is still a little girl at heart.  She loves to be a helper and will often accompany me (at least for a little while) to do just about anything - baking, weeding, laundry, etc.  She is my fashionista, being particularily opionated about her clothes, my clothes and the clothes of her dolls.  I will often hear her say she likes my shirt but doesn't like my pants or some such thing.  At the core of her heart, she wants to know that she is beautiful.  She is sensitive girl who is learning how to respond to a "no" with something other than crying, a sure sign she is learning to handle her emotions.  I see a lot of myself in her so, with that in mind, I try to assure her that, yes, she is beautiful, yes, I do love her, and, yes, I love to spend time with her.  She has asked numerous times when she will be a mom and I can see her thriving at just that someday far off in the future - taking on the awesome responsibility of being a wife and a mother.  I look forward to seeing her continue to grow in confidence and the assurance that she truly is a princess, daughter of a King.  Happy Birthday, my sweet Ali, I sure do love you!
When I asked what she wanted for her birthday, she said a baby.  Now, you must realize this girl has many babies.  With 3 girls in the house, the last thing we really need is another baby doll - we have plenty!  So, I thought maybe some clothes for Kara, her 18 inch doll she received at Christmas, would be a good idea.  So, I got sewing!  Oh, what a lot of fun that was.  I stayed up way too late way too many nights but I am thrilled with the results.  With the numerous patterns I have accumulated (some free, some bought) I can tell I will be sewing again soon.  Especially since older sister RJ is exceedingly jealous of the new clothes Kara received.  Her girl Candy needs some, too!  I told her to wait for Christmas!  Without any further ado, here is what I made, using only fabric and notions I already had (except for a couple of zippers I found at the thrift store)!
This is Ali's favorite dress for Kara!  It is called the Katie dress and the free pattern can be found here
Ali does not like this dress at all!  Remember, she is opionated when it comes to fashion!  I am trying not to be offended!   The pattern is found here.


Another really cute dress!   I love the polka dots!  Free pattern is from here.

This is my favorite outfit so far on Kara!  Ali is learning to like it!  I think the fabric is perfect for this style of tunic, especially with the slight shimmer it has.  I love the ruffles and the turned up cuffs.  It can be made shorter or without the ruffles so I will have to try that eventually.  Also, the jeans have front and back pockets!  So stinkin' cute!!  Tunic pattern is here and jeans pattern is here.


Lest you think all I did was sew clothes, I also crocheted Ali a hat and a headband, both of which she loves.  With that girl, you just never know!  Whatever the case, I had a blast making all those clothes and I look forward to the next 3 complete outfits I get to make for Christmas!  As for now, I am heading to bed!

Linking up to these parties:


Fantabulous Friday!


Friday, August 5, 2011

This Week . . .

1.  The patterns I won in a blog giveaway arrived and what fun it was to peruse the box full!  24 brand new women's clothing patterns all in my size!  Some I will probably not use, like the hospital scrubs, but some I am really excited about - numerous skirt patterns, a cute Asian-inspired top (I love Asian tops!), some coats, lots of dresses, too many to mention!  Now to figure out which one to pick first!


2.  I paid $12.44 for a $199.99 light fixture!  For the longest time, I have pictured a light in my head.  Not sure if I saw one somewhere on-line or on TV but I had this vision of a light fixture in my head that would be perfect for the powder room in the new house.  I wanted something rectangular, with a sheer black shade and lots of crystal drops.  I have looked in many big box stores over and over but never found exactly what I wanted.  I found others that would work okay but not the EXACT one.  Then, the other week, I wandered through Canadian Tire when I saw it!  The exact fixture I wanted.  I was ecstatic!  When I got close enough to see the price was $200, I said out loud, "No way!  I refuse to pay $200 for a light fixture.  I will wait for it to come on sale."  So, wait I did.  Then, yesterday, I looked in the flyer and my light was on sale.  40% off.  That brought it to, with taxes, $134.39 (regular $223.99).  Then, to sweeten the matter even more, I have been stocking up my Canadian Tire money for such a moment sometime in the future when I would find that perfect item for the new house.  I didn't know what it was but I have been saving for quite a while.  (For those of you unaware of what Canadian Tire money is, it is a reward system earning you money based on your purchases.  Jay figured out that Canadian Tire has one of the better points systems out there.)  Well, that moment had come.  I had $121.95 in Canadian Tire money bringing the total price of the light fixture to $12.44!  Woo hoo!  That is patience and persistence paying off!

3.  The 3 oldest kids have been attending a 5 day camp (well, they only found out about it on Wednesday so for them it is a 3 day camp) at a friend's house.  They are singing songs, learning Bible verses, spending time in prayer and learning how to tell others about Jesus.  I firmly believe that it is the parent's responsibility to teach their children about the Lord and about life, not leaving it up to the Sunday School teachers or DVBS leaders or whatever.  And I do.  I take that aspect of life seriously.  But when they have the opportunity to spend 1 hour with others that are confirming what we are teaching, teaching in the same spirit and manner, then I encourage them to go and learn.  And we talk all about it when they get home.

4.  I made 19 half pint jars of Raspberry Red Pepper Jelly, thanks to the recipe from here.  I picked the raspberries from the plants here on my yard and bought the remaining ingredients from the store.  Maybe someday in the future I will grow all the peppers, too, but that didn't happen this year.  I love the gorgeous red color and the taste is a wonderful sweet/spicy combination that would be perfect with crackers and cream cheese.  Just a small reminder - don't walk away from your stove for any reason when you are trying to bring your fruit to a boil.  It will most likely boil over the moment you step back into the room but just before you are actually able to stop it.  Not that I have any experience with that! :)


5.  Harvest has started.  This is a wonderful time of the year full of busy schedules and running here and there.  Every day involves numerous trips back and forth from one field or another dropping off a couple kids and picking up a couple more while delivering food to their hard-working dad.  I know that MIL would gladly feed her son but I see it as my joy and my privilege to bring my husband supper, even if it means packing up all the kids and sitting and waiting at the end of the field for him to arrive.  There is something to be said for being a part of the harvest.  We truly see how the Lord is the only one who can give the increase - all we can do is plant.  The rain and the sun come from the Lord, the plants grow only at his command, and we are honored to be able to reap a harvest of plenty. 


6.  I bought a few more crochet patterns and sewing patterns on Etsy.  A certain little lady turns 4 next week so I best get busy making some gifts.  I guess that is what sitting and waiting at the field is good for - crocheting!  I will be sure to show you what I make next week.  Anything fun happen for you this past week?

Sunday, July 24, 2011

Crafting for a Cause

I really love to create things.  Usually I say that creating allows me some sanity in this insane life I live!  It allows me to focus on something other than the kids.  Now, please don't take that the wrong way!  I love my kids dearly, they bring me MUCH joy and happiness, more than any craft I will make.  Crafting, however, allows me to use a different God-given gift.  Most of the time, I have many helpers as I craft!  When I sew, someone offers to take out all the pins.  When I crochet, someone helps tangle the yarn.  So, all in all, crafting is a family affair!  :)  Anyway.  This week, I was crafting for a totally different cause and it made me so GIDDY!  I had so much fun and I can see it continuing in the future.  This week I was crafting for the Crisis Pregnancy Center (CPC) here in our capital city.  See, a dear friend of mine, who I look forward to getting to know even better, has a passion to help these brave and courageous moms.  She puts together these large gifts full of baby essentials, like diapers, wipes, clothes, bibs, burp cloths, hats, etc.  Lots of people pitch in to donate items, she packs them up and sends them to the CPC.  They distribute them to the moms who are blessed to have these gifts that they may not otherwise receive.  What a ministry!  This week, she sent out an email asking for more items for the gifts.  After that email, it hit me that I have a lot of baby blankets sitting in my closet from when my kids were babies.  I asked if gently used was okay and she said that was great!  So, out came all the blankets, I sorted through them and found 10 large flannel blankets that are in great shape and have lots of baby-wrapping life left in them.  They are now all washed and ready to head to her house.  Then I looked at all the blankets that had seen better days - some had holes, some had stains, some were way too small to wrap a baby properly.  I suddenly thought I could use that fabric to make bibs.  She needed bibs.  I could make bibs.  That night I went out to the fabric store and found some charming cotton fabric in the remnant bin and bought it as well as some diaper flannel for the bib backs.  I would use the old blankets as an inner layer in the bibs to make them extra absorbent.  I found a really easy pattern here and this is the result (5 bibs total):

Then, while we were on vacation earlier this month, I brought along some yarn and was busy crocheting hats for the CPC following the pattern you can find here.  I was able to crochet 3 1/2 hats while we were gone.  It makes great use of the driving time and the TV watching time!  I finished the 4th hat this week while at an appointment with Pepe.  I just needed to add some flowers.  I decided to try adding zipper flowers instead of the usual crocheted flower so this morning I headed to the thrift store and found a bunch of brightly colored zippers.  This evening I whipped together the flowers using my own imagination and the final result? 

Oh.  My.  Goodness!  They are so very cute!  These little ladies will be so stylish with their cozy little hats! 


Now, earlier this week, when I told hubby that I wanted to sew some bibs for the CPC, he asked if I had time for that.  Though I was a bit offended by the question, it really is a good one.  Do we make time in our schedule to minister to others?  We are so quick to give of our money but are we willing to invest our time and energy to help those that really need it?  I pray that I will continue to invest my time in this avenue.  It has always been dear to my heart and now I know of a tangible way to be involved supporting these women that give life to their babies and take on the challenge of raising them and loving them.   So I ask you, have you ever crafted for a cause?

Thursday, July 14, 2011

Lydia Apron in Shades of Blue & Brown

With temperatures soaring to 34C-36C (93.2F-96.8F) this coming weekend and into next week (so they say), I am determined to stay inside and work where it is cool.  We have not had temperatures like this for a number of years so the heat is really quite welcome so long as we also get some rain!  I REALLY need to clean and purge but I also have another apron pattern to create!  The apron I finished today is another in the Lydia pattern but in shades of blue and brown instead.  I absolutely love the swirl pattern and find this apron to be elegant and sophisticated!  As usual, it is available for sale in my store!

Saturday, July 9, 2011

The Lydia Apron

We just got back from a week away and I was thrilled to buy myself a stack of fabric!  I love the colorful selection I found and I am excited about creating new aprons.  So excited, in fact, that I already made a new one.  I am calling this one the Lydia apron.  The other apron I have created I named the Anne apron after my 96 year old grandmother.  This newest creation is named after my other grandmother, who passed away 8 years ago from Alzheimer's Disease.  She was a spunky little lady who I saw all the time since we lived just "next door."  She was always cooking or baking something in her little kitchen and I can imagine she might have worn an apron something like this.  So, with no further ado, I give you the Lydia apron!


This simple but charming apron has two darts in the body of the apron to give it some shape while the wide contrasting ruffle adds some flare!  The waistband matches the ruffle but the white lace trim adds some extra drama!  This apron will be available in my shop later on today.  Remember to check out the sidebar link to my shop to see all the aprons currently available!  Thanks for stopping by!

And, just because I can, I am linking up to these parties:

Out on a Limb Tuesdays with Cat on a Limb

The DIY Show Off

Wednesday, July 6, 2011

Guest Posting - Come On Over!


Sandra from Sawdust and Paperscraps is having Christmas in July this year!  She has invited bloggers to guest post on different gift ideas and she has graciously allowed me to join!  So, come check out my featured gift item complete with tutorial!

Saturday, July 2, 2011

New Items in My Etsy Store

I have been busy sewing the past couple of days and added a few new items to my Etsy store.  Just click on
the link in the sidebar labeled "My Etsy Store" and it will show you some of the items currently in stock.  If you then click on the photos of the items, it will take you to my store where you can get full listing details.   
I am going fabric shopping this next week and I look forward to coming up with more color options and new styles so check back often!  Remember, any local shoppers can pick up their purchases at my house for free!

Thursday, June 30, 2011

Latest Thrifting Treasures

I love our local MCC thrift store and frequent it occasionally (I rarely come home empty handed so I need to limit how often I go - less during the school year, more during the summer). The kids and I biked over yesterday and these are the three treasures I found:

First off, I love footed glass bowls! I have a growing collection. I found this dainty crystal version for $1 then carried it around the store knowing that if I put it in the cart, little Ari was sure to break it. I imagine serving jam in it at a beautiful brunch! I usually make a nice brunch on Saturdays - maybe I will up it a bit and use my really pretty dishes to serve all the food!


Secondly, I found 2 boxes of 4 1/4 x 4 1/4 inch arctic white wall tile by Dal Tile. One case is unopened and one case has only about 5 of the 100 missing. They were $10 per box - new they would have been $0.28 per tile so about $54 for both boxes. Not a massive savings but certainly a deal. I am not sure where they will go but maybe in the powder room?


Finally, this beauty I had seen the week before and I was hoping was still there. I hesitated then and thankfully, no one bought it. At $8, this was the best deal! I told Jay we must name the dress form as that is just what you are supposed to do - he gave several options and finally came up with "Lacey". I liked that one so Lacey she is! She is in need of being recovered but for now, she works just fine like she is. Obviously I couldn't take her with me on the bike so we had to make a return trip to get her and the tiles.


All in all, a successful shopping trip!

Any great thrifting finds you have found recently? Do tell!

Sunday, April 10, 2011

A Gift for a Friend

Once upon a time, a long time ago, the Lord allowed me the privilege of meeting a sweetheart of a girl, a beauty who I immediately called friend! Her smile is wide, her heart so big and her hugs tell you she cares about you. Lately, she has been going through a tough time and it makes me sad. I really wanted to let her know in a tangible way that she is loved and cared for in the midst of trying times. I wish I could just pop over for a hot cup of tea and show her I care in person but the distance prevents that. So, I made her a little gift. Something to brighten her day. Something pretty that she can wear and remember that, no matter what, there are those in the world that love her and think she is amazing.


I bought myself a hostess apron of this style (black and white in color) a few years ago at a Hobby Lobby. Ever since, I told myself I wanted to make a pattern from it and make some more aprons. This seemed like the perfect time. Then, when we went to Fargo a couple of weeks ago, the Hobby Lobby is where I turned for fabric! The choices they had were amazing and I am kicking myself for not buying more, seeing how wonderfully this apron turned out. It is SUPER easy to make and requires only 2 pattern pieces. Next time I have some more fabric picked out for this project, I will be sure to tell you how to make your own, with pictures as a guide. For now, you will just have to look at the outcome!


Linking up to the DIY Project Parade!


The DIY Show Off

Wednesday, December 22, 2010

Halter Sundress For 18" Bear

RJ is getting another Build-A-Bear for Christmas (shhhh, don't tell her!). This time it is a bunny! However, rather than buying clothes for the bunny, I wanted to make her a dress. So I did! I had an idea in my mind and it turned out just like I pictured! Don't you love when that happens?! And since I love to give, I am going to give you the pattern and instructions on how to make this simple halter sundress for any 18" bear, Build-A-Bear or not, for free! This is really very simple to make, requiring only straight stitching and very little time. I actually made this entire thing in front of the girls but they had no idea what I was making! :)

Free Sewing Pattern for 18" Build-A-Bear - Halter Sundress

Supplies Needed:
1 - 18"x4" rectangle of fabric
1 - 36"x6" rectangle of fabric
2 - 9"x2" rectangles of fabric
36" piece of lace
1" piece of Velcro
matching thread
sewing machine
iron
pins, scissors, etc.

1. Take your 18"x4" rectangle and fold it in half lengthwise, wrong sides together. Press. You now have an 18"x2" rectangle. Open the folds you just made. Take the raw lengthwise edges (the 18" sides) and fold them in 3/4"; press.

On the ends (the 4" ends) fold in 1/2"; press. Fold your rectangle in the middle again (the very first fold you made) and you now have a rectangle about 1 1/4" wide by 17" long; press well. We will refer to this piece as the band. Set it aside.


2. Take your 36"x6" piece and turn under a 1/4" on the bottom 36" edge. Press. Turn under 1/4" again; press. Stitch. You have just made the hem at the bottom of the dress. We will refer to this piece as the skirt. On each of the 6" sides, fold under 1/2"; press. Fold under 1/2" again; press again. Stitch.


On the raw top 36" edge, sew a gathering stitch along the top of the piece, close to the edge. If you don't have a gathering stitch, set your stitch length to long then make two rows of stitching close to the edge. Make sure the rows do not cross over each other. Gently pull up the bobbin thread on these two stitch lines you just made. You will gather this edge of the skirt. Gather until it matches the length of the band you previously made.


3. Once you have the skirt gathered, you will attach it to your band. Place your band with the open long edge at the bottom and the folded long edge at the top. Take your gathered skirt and place it inside the band, a bit more than 1/4" in. Pin in place. Stitch across the band catching the skirt as you go. Once you have finished that first row of stitching, do another row right close to the first row you just made. Then stitch close to the upper edge of the band, across the whole band. You should now have the band and the skirt attached to each other.


You are getting close to being done! Take the 36" piece of lace and attach it to the bottom of the skirt. If you do not want to use lace, I would make the skirt about 1" longer.


4. Take your 2 - 9"x2" rectangles and fold them in half lengthwise, wrong sides together. Press. Open up the fold. Fold the long 9" raw edges in until they meet in the middle; press.


Take the short 2" ends and fold in 1/2"; press. Fold the rectangle in the middle again so that your finished size is 8"x1". These are your straps.
5. Take your dress and fold it in half to find the midway point. Place a pin here on the band to show you the middle. Measure 1 1/2" out on both sides from this middle point and mark with a pin again. These second pin marks are where you will place your straps. Sew your straps in place. They will tie in a knot behind the bear's head after you put the dress on the bear.


6. Take your piece of velcro and sew it on the back of the dress, where the ends of the band would meet.


7. Add any embellishments to the dress as desired.

8. YOU ARE DONE! Congratulations! Obviously this can be modified to make a sundress with spaghetti straps instead of halter straps or shorten the dress and omit the straps and you have yourself a skirt. I am sure that little girl will enjoy this dress on her bear just as much as you enjoyed making it. If anything is unclear or needs further clarification, please let me know!

Related Posts with Thumbnails