Showing posts with label lighting. Show all posts

Saturday, November 10, 2012

Owner Building a Home - Week 25 - Countertop Forms, Dyed Basement Floor

MONDAY - Once again, I had to take AJ to an orthodontist appointment so that meant I spent the afternoon in the city.  I figured while I was out that way anyway and the kids were at Grandma's, I would run from one end of the city to the other getting house stuff.  First, I bought 14 DOZEN wine bottles (which equals 168 bottles!!) for $30.  I need these so I can smash them into little bits of glass that will be seeding on my island counter top.  So far, I have smashed 3.  Only 165 to go.  Actually, I don't think I will need them all but we will see.  Then, just a little way away, was the special water-based dye I ordered for our basement floor.  I ordered H&C Concrete Semi-Transparent Decorative Stain in Obsidian from the commercial Sherwin Williams store on the far end of the city.  I went and picked up the 7 jugs and added those boxes to all the boxes of bottles.  The back of the van was very full!  Good thing our back seat lies down flat and I only had 1 child with me.  Then, I was just around the corner from a flooring store so I ran in and picked out the vinyl for the kids bathroom.  They quickly cut it and I paid and then added that large roll to the van and we were off to the opposite side of the city for AJ's appointment.  We made it on time and he is now sporting a blue retainer.  After his appointment, I ran into Home Depot to pick out some trims for the recessed lighting on the second floor.  And then back to the house.  On days like this, I feel like I get nothing done.  I feel unproductive and like I have not contributed.  I know, if I didn't do those things I wouldn't have been able to do what I did the rest of the week . . . but, still.  I don't really enjoy those days.  I would rather work AT the house.  When I got to the house, I saw that Mr.W had continued to install all the lower cabinets.  They were well secured together and to the walls.  The kitchen really starts to take shape.  However, we ran into a little snag.  Our island is 8 inches wider than I had ordered.  The base cabinets were supposed to be 16" deep and were 24" deep instead.  It doesn't affect too much except the end panels.  I had ordered matching moulded end panels for the island (to match the drawer fronts) and they were now 8" short.  My lovely kitchen designer was just a phone call away.  She agreed that the company made an error and said I had two options to fix it - I could either have new cabinets or new end panels.  Since the cabinets were already attached together and the extra 8" doesn't bother me, new end panels it is.  What a great company!

TUESDAY - You must understand, when I get on site in the afternoons, generally I spend 1/2 hour or more talking to Mr.W about many different things, clarifying and verifying what is I want and how we should go about it.  This day it was about the counter tops.  Mr.W had started forming the counter top moulds!!  That is super exciting.  One step closer to counter tops.  To be honest, the concrete counter tops has been the most stressful part of this house building for me.  Finding the right ingredients, finding a company that has the right ingredients, learning how it is done, wondering if we can do it well, etc.  It has consumed ENORMOUS amounts of time and effort on my part so I will be thrilled when it is over. 


Before Jason took the kids home for supper, I got him to help me install the lounge light fixture.  It is big and heavy and totally impossible for me to do by myself.  But . . . WOW!!  Is it beautiful.  It hangs a bit high so I need to drop it about 6" but it is fine for now.  At least there is light.  Then I started installing more flooring.  The flooring in the lounge had been left undone due to casings being stored there but they were all gone so it was time to finish it up.  I spent the rest of the evening, until late, finishing up the flooring.  It went really well until the very last piece!  That last piece was a mere 3/4" wide so I had to glue it to the rest of the flooring.  It worked out better than I expected and now all the laminate on the second floor is complete (if you don't count the office).


WEDNESDAY - During the day the guys made sure the basement was vacuumed and free of dust so that I could start etching the concrete floor.  The difference between the water-based dye and an acid-stain is that the water-based dye is just sprayed on and colors the top surface of the concrete.  The acid-stain is a stain that has a chemical reaction with the salts in the concrete to color it.  You then need to neutralize the acid-stain before you can seal it.  After lots of research, we decided the water-based dye was easier to use and more likely to give consistent color.  Acid-stain will react differently to the concrete, depending on how it is troweled.  It is harder to get consistent results.  The first step in the water-based system is to etch the concrete to make it porous so it accepts the dye.  I used Klean-Strip Green Safer Muriatic Acid mixed according to the instructions on the bottle to etch the concrete.  I sprayed it on the 1300 sq. ft. (this does not include the cold storage or the utility room.  They can stay plain!) with a pump-style sprayer and let it sit.  It was supposed to sit for 10-15 minutes but that didn't happen.  While I was applying the etching solution (which hardly smelled at all thanks to the 90% lower fumes this particular brand has) the water supply was shut off completely so that the pressure tank and water line could be connected in the house.  That is a super important and really exciting event.  However, I couldn't rinse the floors.  So, I ended up taking the kids home for a late supper (which has become the norm) and then when the water system was all set up in the new house, Jay came home and I went back.  I could then attach a hose to the water supply in our house (which means we have water in the new house!!!) and flood the floor with water.  The acid had now sat on the floor for a couple of hours.  After flooding each area, I scrubbed it with a long handled scrub brush and then vacuumed up all the water with a shop vac.  Needless to say, it was a good workout and my arms and back were sore by the end.  That floor was so clean you could literally have licked it! 

THURSDAY - Now that the floor was etched, I could apply the water-based stain.  I mixed it 1-to-1 with water and sprayed it with the pump-style sprayer, using circular motions.  Because the color I chose was Obsidian, it went on jet-black!  This was the easiest part of the job.  I just sprayed the whole floor and then let it dry.


I only used 3 1/2 of the 7 bottles so I could always do another coat if needed.  It took a little less than 2 hours to do and by the time I was done my hands were all black and I had splattered dye on my face but the floor was done for the day.  I quickly went home to wash up and get ready for a concert Jay was taking me to - Philips, Craig and DeanIt was unreal, it was soooo good!  The praise and worship for our Lord was heavenly!  And I could listen to their voices for a very long time!  It was fantastic!

FRIDAY - The floor needed to dry 4-6 hours before applying the sealer.  With this dye, you can use whichever sealer you want.  I was a little alarmed at the fine powdery residue that is left on the floor after letting it dry but according the company's website, that is to be expected if the floor is flooded (which it was) and does not need to be removed.  It also changed from jet-black as it was wet to a grey color when it dried.  In an inconspicuous spot I applied a clear sealer to see if the color was good.  The black came right back so no other coats of dye were needed.  Mr.W picked up 2 large 5 gallon pails of Deft Water-Based Polyurethane in a satin finish for me to use as a sealer.  I stirred it up good and poured it on small sections of the floor and smoothed it all out with a lambswool applicator.  The lighting is terrible in the basement because there are no lights wired up yet so I couldn't see the best at what I was doing.  Plus the first coat absorbs into the floor so much.  It looked terrible when it was done. 


I waited about 2 1/2 hours and then applied another coat.  This coat went on so much nicer and I kept it a little wetter than the first coat.  Honestly, I have no idea how it looks because I left long before it dried.  While I was waiting between coats, I ate some supper and finished attaching the sub floor in the kids bath.  Jay had cut the 1/4" mahogany sub floor and installed it in the bathroom and had started attaching it.  I finished it up.  Now he can install the vinyl.  I also finished installing the small recessed light we have around the exterior of the dining room in the bulkhead.  Jay spent considerable time earlier in the week fishing the wires through the bulkhead and wiring the fixtures up.  They were left dangling from each hole and just needed to be pushed up, tightened and have the trim installed.   Besides one that is directly below a vent, the rest went in really well and it looks so lovely.   Now I just need light bulbs!

And that brings us to today, Saturday. The house we live in is a worst disaster than it has been in a long time.  It is long over-due for a day at home.   It was supposed to snow like crazy last night and it didn't.  We were preparing to hunker down for the day knowing that it would be treacherous to go out.   It isn't.  But we will stay here anyway.  Besides, after 3 days of either spraying or scrubbing or spraying or smoothing, my arms are SORE!!  Time for a day off!

PS:  You will notice I don't mention what Jay does very often.  Often that is because I don't even know what he is all doing.  For instance, when I work in the basement, I don't go check to see what he is doing because I am busy working.  But I promise you, his days are just as full as mine, if not fuller!  :)

Saturday, November 3, 2012

Owner Building a Home - Week 24 - Doors, Millwork, Geo-Thermal, Etc.

It's Saturday morning as I sit and write this.  The house is quiet.  The boys are with Jay at the new house and the girls are playing a few doors down with a neighbour friend.  I am tired.  But, I usually am by this time of the week because I usually spend Thursday and Friday evenings working long at the house.  This week was not exception.  And that is why I ALWAYS have a Sunday afternoon nap.  Ooh, and today we get to move the clocks BACK one hour so if I am really smart, I will sleep 1 hour more, not work 1 hour more!  Alrighty then, the week in review.

Monday - My dearly beloved husband took a trip into the nearby town to pickup this beautiful secretary for me.  Surprise was that it doesn't come apart into 2 pieces as we were expecting (and as the seller stated) so I am not sure if we will be able to get it into my craft room like I want.  I will either have to figure out how to separate it without destroying it OR maneuver it down the stairs in one piece OR remove the basement stairs and drop it down into the basement.  As for me, I went to the orthodontist with both boys in the afternoon and then did some shopping so I wasn't at the site at all.  Mr. W started working on the casings around the windows.


Tuesday - A long-awaited day - hydro finally came and hooked up power to the house. 


We had limited power before with extension cords but now we can power up the whole house.  It is so lovely to work late at night and be able to turn on and off lights as I go.   It really helps to eliminate falling down the stairs or tripping over tools!  I think this is the day the interior doors started going up and casings continue. 


We also started installing  baseboards.  However, it was another short day due to small group in the evening.

Wednesday - Also another big day - the installation of the Geo-thermal pipes outside began. 


The excavator digs big trenches, lies 2 rolls of coiled up pipe in each trench and then covers them back up.  Those coiled up lines are all attached to another straight pipe which runs into the house.  All those pipes are filled with water which is either heated or cooled by the earth itself.  That is a really simple explanation for a more complicated Geo-thermal system.  It was fun for the kids to watch.  We have the perfect soil with no rocks at all.  Well, they did find one large rock, which they removed, but there weren't any other rocks at all - not even fist sized ones.  Perfect sandy/clay soil mix.  While they worked outside, Jay was working on the plumbing in the basement. 


Our other plumber/HVAC guy is too busy to get our work done so we are finishing it up ourselves and hiring some other help.  For now Jay is doing the plumbing.  I continued to work on the casings and baseboards while Mr.W continues to hang doors.  Hanging doors may look really simple but to get them exactly straight and level and closing perfectly can be a bit tricky, especially if there is any torque or twist in the doors.  Mr.W does a great job.  He hangs the doors so that I can do all the other trim work.  This was another short day as we went out for supper with the kids and then shopping to fill shoe boxes of toys/toiletries for Operation Christmas Child, a yearly tradition for us.  We went to Boston Pizza where they had this amazing deal that for a $5 donation, they would give you 5 free kids meals.  We bought 4 cards at $5 each ($20) and received 20 kids meals ($6.99 each).  It saved us $119.80.  Going out as a family the next 4 times to Boston Pizza will be very economical! 

Thursday - The outside work for the Geo-thermal was completed today and they will return in about 1 1/2 weeks to start the inside work.  Mr.W continued to hang doors.  Jay continued plumbing.  I stayed late and installed baseboards, casings and made some pretty crowns for the door headers.  Mr.W had made one crown header for me as a sample and I took it from there.  They are easy to make and add so much detail.  I made 3 headers on this day. 

Friday - Jay finished the basement plumbing for now and worked his way into the master bath where he is trying to get the drains for the shower and tub connected.  Mr.W hung a few more doors upstairs and then started making his way to the main floor.  He just started to install the base cabinets in the kitchen, ensuring they are level and well-stabilized for the concrete counter tops going in.  While they were doing that, I continued with casings and baseboards.  The pink room (little girl's) room is now done.  {When I say done, I mean all the casings and baseboards are installed - the filling of the holes/sanding/touch up painting on the mill work still needs to happen}.  The orange/grey room is done.  I was working in the purple room but getting frustrated at the mitered corners so I started working in the hall.  I also made 2 more crown headers for the master bedroom door and installed the headers I made on Thursday.   Mr.W painted them earlier and they were ready to go up.  I really like how they turned out.  I stayed late working on all those things yet again.


Saturday - That brings us to today.  It snowed last night - I am not sure I am ready for snow yet.  However, I am extremely thankful for our wood-burning fireplace at the new house.  It is what is keeping the place cozy warm.  We keep it filled all day and Jay fills it back up first thing in the morning.  The house is also well insulated so that heat is staying in the house just where it should.  I also believe we have much better windows in the new house so even without window coverings, they are insulated well, being that they are triple-pane, dual-argon, dual low-E.  They are some good windows.  At the house, Jay continued to landscape the yard with the tractor.  He was pulling clay away from the area where the Geo-thermal is located and putting it on the driveway.  The driveway needs to be built up quite a bit by the garage and clay is the perfect thing to use.  Either later this fall or next spring, we will bring in more soil to cover the exposed clay in the back.  I brought all the fixings to make french toast at the new house so we ate lunch there.  After lunch, I installed a few light fixtures.  I bought this one of the girl's room so long ago, it was fun to finally put it up.  It is so cute.  Super filthy right now but once we are done with all the dusty work I will clean it properly.  Plus I only put 3 bulbs in when it takes 6 but it looks super cute already!


After the lights I continued on the casings and baseboards.  I added a few here and there but the main work was to make a huge crown for the end doors in the hall.  At the end of the hall, as you can just see on the far left in the photo above, is Pepe's room and around the corner to the left are 2 hall doors and then around the corner again is AJ's room.  All those doors are in such close proximity that it doesn't work to make 4 separate crown headers.  Instead, I made 3 headers, 1 above each of the boy's rooms and 1 above both hall doors.  However, they are all connected so they look like 1 giant crown header.  With so many corners to consider, they were certainly tricky to make and they aren't perfect but they look great.  They will be painted next week and then I can install those.  I have now made crown headers for 9 doors upstairs and I have all the inside of the master bedroom/bathroom left to do.  These fancy crown headers will only be on the hall side of the doors on both floors plus on all master bedroom/bathroom windows and doors.  They are actually fairly simple to make and come together pretty quickly.  And that brings my week to a close.  What did you do this week?

Tuesday, October 2, 2012

Owner Building a Home - Week 19 - Painting and Siding!

Monday - Before I arrived on site, Jay had started shingling the porch roof with Mr.W.  After Mr. W got him going, Mr. W primed the walls of the upstairs.  It goes so much more quickly when you can spray the walls then to have to roll them.  Once the primer was dry, Mr.W sprayed the ceilings with Distant Gray by Benjamin Moore.  It is a wonderfully warm white and I love the look of it.  To be honest, I have no clue what I did this day.  I think I just kinda wandered around pretending to help but by the end of the day, I am not sure what I did.  Looking at the calendar, I realize I took both boys to an orthodontist appointment that afternoon and that is why I accomplished little at the house.  I took time to wander the mall with the boys as a sort of date with them, looking at toys, lego and other fun boy things.  I found the duvet covers for the little girl's room so I am super excited about that.  Clearance sale at Quilts, Etc. - I like that!

Tuesday - Since the ceilings were painted yesterday and all the paint was used up, I needed to go paint shopping again.  This time I bought the paint for all of the upstairs, making that big money commitment and choosing colors I really hoped I liked when they were on the walls.  I also bought more ceiling paint.  Today I took Ari on a date with me.  We bought paint, ate lunch, did a little shopping and then went back to the house.  Jay took the kids home for supper and I stayed to paint the first room!  It is pink and bright and really pretty (Benjamin Moore Pink Taffy)!  The little girls love it. 


When I got home around 9pm, Jay and I celebrated our 13th wedding anniversary by eating rice and fish by candlelight.  We will go away for a couple of days in a few weeks to really celebrate!

Wednesday - While I spent all day painting inside, Jay was "painting" outside.  He was installing the siding with Mr.W.  It looks so fantastic with the 6" wide white trim around the windows and doors.  I love the look of the house from outside!


And, I was moving along fairly nicely inside.  Mr.W had only one suggestion to make my painting even better and I will share that with you.  When you are cutting in the paint between the ceiling and the wall, don't paint right up into the corner on the first coat (if this is a new paint job).  Since the primed walls still suck paint a little, the brush doesn't move quite as smoothly on the wall and it is harder to get a straight line.  So, stay out of the corner 2-3 mm.  On the second coat, get the brush right in the corner between the ceiling and walls and because you are painting over one coat, your brush moves smoothly and your line will be even straighter.  Works super well!  That is, of course, if you aren't using tape, which I don't.  Today I did the second coat of pink in the little girl's room, the first coat of purple in RJ's room (Benjamin Moore Bonne Nuit),


the first coat of blue in AJ's room (Benjamin Moore Seaport Blue) and I started on the orange strip in Pepe's room. 


Of all the colors, I don't like the way the orange covers.  It is the exact same Benjamin Moore paint as the rest but the coverage is horrid.  I am not sure how many coats it will take but more than 2, that is for sure.

Thursday - Mr.W was gone for the next 2 days so Jay and I just kept on working. 


He continued on the siding and I continued painting.  You see those little green things on either side of Jay?  They are called Gecko Gauge and they allow Jay to install siding all by himself.  They clip under the last piece of siding you installed and the next piece just slides in on top of them.  They hold the piece in place while you attach the siding to the houes.  Then you unclip them, move them up one piece and install another piece of siding.  They are completely adjustable so you can change how large the spacing is on your siding.  They are fantastic!!  Jay is so glad to be using them! 

I finished the second coats of the rooms I started yesterday and then spent too much time putting on a second and third coat of orange.  It still needs 1 more.  I also painted Pepe's closet with 2 coats of orange and it needs more.  I hate orange paint.  The other bedrooms are beautiful!  Then, I worked late and painted my bedroom!  Oh my goodness, I love it!  I wasn't sure about the color on the large paint chip and I wasn't sure about the color when I opened the can and I wasn't so sure when I put the first bit of paint on.  But when it dried a few moments later, it was gorgeous.  It is Benjamin Moore's Overcoat - dark grey with slightly brown under tones.  So elegant.  So romantic.  I love it!

Friday - Since the ceilings are already finished, I decided to hang 2 light fixtures in my bedroom.  After seeing them in place, it is starting to feel a little surreal.  No one dreams about the framing of their dream home.  No one imagines the concrete work or plumbing pipes, electrical wiring or heating ducts.  What you do imagine is the paint colors, the light fixtures, the trim details, the color of the siding - all that fun stuff.  And that is where we are at now.  It is very wierd to look at my room with the finished 2 coats of paint and light fixtures in place and realize this is my room.  I still cannot believe it.  It looks too pretty, too upscale, too just-like-my-dreams for it to be mine.   And yet it is.  I guess dreams can come true!  :)  I finished the paint in the bedroom and then started painting the master bath.  Once again, I wasn't so sure about the color.  I wanted a grey and this one just seemed more brown.  When I put it on the walls, I still wasn't sure.  Jay said he loved it.  I waited until Saturday and then I realized I like it, too.  It is called Benjamin Moore's Escarpement and for this paint, seeing finished rooms on-line painted in this color gave me the confidence that it would look lovely.  And it does.

Saturday -  Today the town we live in was having a town-wide garage sale so I spent the morning with the kids touring around town, hopping in and out of the van to find treasures.  Let me tell you, garage sales with kids who can buckle themselves in and unbuckle themselves is world's easier than having to do it for them.  What a fun morning!  Then in the afternoon the 2 older girls went to a birthday party, the boys spent time with dad and grandma and I took Ari on another date to pick up the duvet covers I bought for the little girls.  While there I found the bedding for RJ's room and for our room!  It will be so lovely.  And all on clearance!  I never did do any work at the house but Jay worked away on the siding.  This day didn't show as much evidence of what he did but it was lots of little things that aren't always easy to see.  It should make Monday easier, though, to have those details ready.  As for me, Monday I start in with school in full force so we will see what time I get to the site.  I am hoping to get there around 2-2:30 but we will see.  And that wraps up the first week of finishing!

PS:  No photos at the moment in this post.  I left the camera on site so I cannot download any now.  Besides, trying to take photos of the room colors is nearly impossible in only natural light or with a flash.  Since there is no electricity on site, I cannot turn on any lights.  I tried numerous times in numerous rooms to get photos and they all look terrible so you will have to wait for "painted room" pics.  But the outside photos of the siding will come later today.

Monday, September 17, 2012

Owner Building a Home - Week 17 - More Drywall, Insulation, Well Water, Etc.

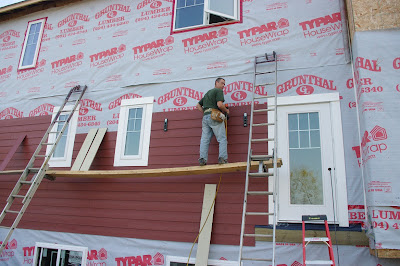
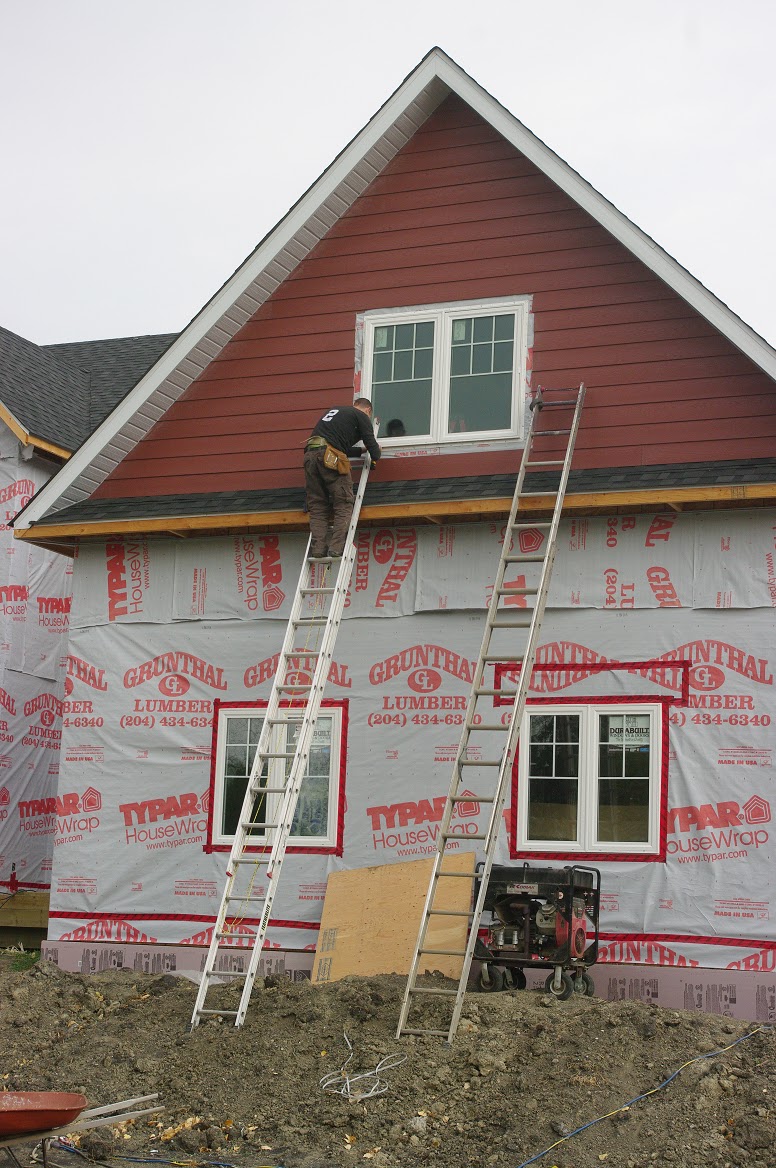
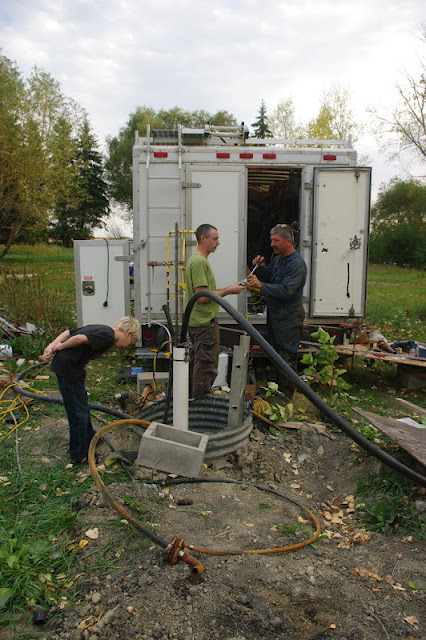
TUESDAY - Today was a great day.  Well, Jason might say that now at the end of it but during the day it was a bit tense for him.  For the majority of it, Jason was helping a friend raise the well to the surface level.  See, the property we bought already had a well on it but it is an old well.  Back then when they dug the well they only brought the well head about 8-10 feet below ground level.  They put a large steel ring around the well and then you cover that ring with plywood to prevent anyone from falling into that 10' deep x 4' wide hole.  With a well like that it is easily contaminated since surface water can run into the well water and make it undrinkable (the state it is in now).  We have actually applied for and been accepted to receive grant money to raise the well to the surface and cap it above ground level, making it safer and less likely to be contaminated.  That day was today.  First of all they needed to determine how deep the well was.  We were guessing 90' and it proved to be about 85' - average depth for our area.  The big question was how much volume could our well pump out?  The amount of volume it can pump is a huge factor in whether or not this old well would be able to accommodate our family and the possibility of geothermal heat for our new house.  If the volume was low, we may need to dig a new well.  We were hoping for 28 gallons per minute but were shocked to discover it is pumping more than 37 gallons per minute, more than enough to provide for our family and geothermal heat, should we go that route! 


That was a big "Praise the Lord" moment!!  He continues to provide for us.  Then the challenge was to snake the electrical wire through a pipe from the submersible pump in the well to the new house.  It is more than 100' away and the pipe had a kink in it causing some challenges.  What they did was push a fish tape into the pipe by the house until it came out by the well, attach the 2 electrical wires to the fish tape securely so they couldn't come off and then Jay pulled the fish tape back through the pipe until the wires came out by the house.  Sounds simple.  But it wasn't.  It was hard work pulling that fish tape back out.  He used his hands.  Then he used a pair of pliers.  I was coiling the fish tape back onto the spool and sometimes he was only able to pull a few inches at a time.  It was sloooooooow going.  Then I grabbed a pair of pliers and we pulled together, at the same time, and before we knew it, we had that wire to the house!!   Another "Hallelujah"!  We now have the pipe to pump the water to the house and we have the wire to connect the submersible pump to the house.  We have well head lifted to the surface and we have a well pumping plenty of water each minute.  Now we need to shock the well to decontaminate it so we can actually use it for drinking.  Shocking the well is a simple process of pouring a whole bunch of bleach into it until all the lines are clean.  Of course, once that is done, I think we will get the conservation district to retest it to ensure it is drinkable.  I wonder how it tastes?


While Jay was working with our friend on the well, Mr.W and I worked on insulating the office.  The drywall crew wants to get in there tomorrow evening so we need to finish up the insulation and the poly.  Most of it is complete and we even installed the office window (Jay, Mr.W and I) today so it will be ready to drywall tomorrow as requested.


WEDNESDAY - Knowing the drywall crew was going to be working in the office boarding it completely this evening, we focused our attention on getting the last details ready.  We ran out of bubble foil to wrap the ducts in yesterday so we finished that up today.  Those ducts are nice and cozy wrapped in a layer of R20 insulation and then wrapped in bubble foil. 


Once that one duct was wrapped the rest of the insulation was put into the walls and the poly put in place to seal the insulation.  Then we checked to make sure all the outlets were sealed as well.  I had a little helper for a few of these! 


First you run a bead of that black, sticky tar -like acoustical sealant around the outlet to seal the 2 layers of poly and then you tape the two poly layers together.  Somehow I ended up getting acoustical sealant on my shirt which then transferred to Ari's hair when she was helping me.  Not sure how to get it out yet but I will worry about it later!  Once all the poly was sealed and in place we added the additional strapping around the window (after foaming the space around it with foam insulation), framed in the door opening to the one closet and finally cleaned out the room of all things non-drywall.  It was ready.

Once we were done with the office, we moved to the main floor to get that ready for drywalling by Saturday.  Jay and Mr.W worked on framing out the fireplace opening.  It is so fun to see that taking shape but it sure takes a lot of figuring and I am SO GRATEFUL for the very intelligent and creative man that Mr.W is and that he can figure those things out.  He had all the specs for the fireplace and what was required for framing but it took a lot of conversing between he and I to figure out what the finished fireplace would look like.  How big is the hearth?  How wide is what some refer to as the cheek or the stone surrounding the fireplace insert itself, how big is the mantle and how high off the ground and how wide is the header which is right under the mantle?  How am I planning on finishing the space above the mantle?  How far into the room do I want the fireplace to protrude?  There were certain specifications I needed to meet to ensure the fireplace was framed in according to code but after that it is personal preference.  After a lot of talking and looking online, I was able to figure out what I wanted and Mr.W and Jay were able to frame it according to the end goal.  It will truly be the centerpiece of the room when it was done (although Mr.W did say he was just going for mediocre! :-D  ).


While the guys were working on the fireplace I was putting insulation into the ceiling joists between the first and second floor.  This insulation is not so much to guard against the cold but to create a bit of a sound barrier under the kids bedrooms.  In fact, as you read on their website, the fact that it is so dense actually compromises its ability to prevent heat loss.  The insulation is called Safe 'n Sound by Roxul and it is a very dense fire-resistant material made out of stone.  It behaves very differently than fiberglass insulation but works great to deaden sound, its main purpose.  Since it is fire-resistant, it is also an effective means of slowing the spread of fire, should that ever occur.  It is more costly than fiberglass insulation so we have chosen to "sound-proof" only under the kids bedrooms (or what would be above the living room, part of the kitchen and the dining room - that way if we want to have company over later in the evening, the kids can still sleep).  As for interior walls, we have put the Safe 'n Sound in the powder room walls, in the kid's bathroom walls upstairs and in our master bedroom walls.  The farm bath downstairs shares walls with the pantry and the laundry room so we didn't feel it was necessary to put any there.


When the guys were finished with the fireplace framing, they moved onto the laundry chute (not "shoot" as I spelled earlier!).  I framed out the closet in the farm bath the other day but didn't tackle the laundry chute (which runs in the very upper part of that closet since it backs onto the laundry room) because I just couldn't figure out how to do it.  I left it for Mr.W (and if I tell him often enough how fantastic he is, he really doesn't mind!) so he finished it off.  The laundry chute will start in the master bath in a small wall beside the toilet and then dump down angling into the laundry room landing in a wall cabinet just above the laundry sink (at least, that is the plan!).  We originally wanted to put it under the master vanity but the spacing was a challenge so we changed the plan.  Right now it is just the rough framing - it will be finished with a smooth, non-snag surface later.


At the end of the day, we felt good about what we accomplished.  We do have a bunch of cleaning up to do in the main floor before Saturday since it is really a mess there.  It will be hard for the drywall crew to move around the way it is now.

THURSDAY - I am not sure what we all did this day but Mr.W finished up as much of the ducting as we could.  There is one piece of specialty duct work that will be picked up on Tuesday but the remaining work has been done.  This has allowed us to create the bulk heads and dropped ceilings where we needed to in order to allow the drywallers to continue.  By the time they are ready to board the pantry (where most of the duct work enters into the basement) we will have finished up the last little bit and the main floor can be boarded completely.  The drywall crew was busy at work putting on the second (and maybe even third) coat of drywall mud.  Fans were set up to help it dry quickly.
 
OFFICE BOARDED

LOUNGE WITH 3RD COAT OF MUD


FRIDAY - Honestly, I don't even know what the guys did today because I was hardly on site at all.  I had to take Pepe to his audiology appointment (all is sounding good), I had a haircut appointment (haven't had one yet in 2012) and then I went to pick PAINT COLORS!!  I was a little overwhelmed but I had an idea of what I wanted.  Eventually I walked out with 8 sample cans and 2 extra-large chips to help the decision process.  I picked the following colors, pending approval from all involved and how they actually look in the various rooms (all are Benjamin Moore colors):

Overcoat  CC-544 (main floor areas like kitchen, living room, hall, mudroom maybe?, boy's rooms)


Escarpment CC-518 (dining room, laundry room ?)


Smoke Gray 2120-40 (master bedroom/bathroom?)


Pewter 2121-30 (upstairs hall, lounge?)


Distant Grey 2124-70 (the white for ceilings, doors, trim)


Pink Taffy 2075-50 (little girl's room)


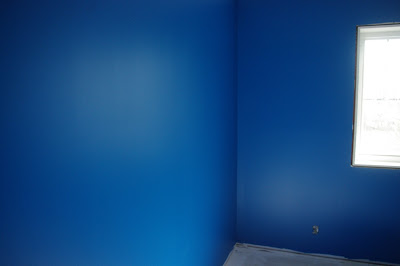
Seaport Blue 2060-30 (AJ's room)


Citrus Orange 2016-20 (accent in Pepe's room though the paint chip looks more orange and less yellow)


Bonne Nuit AF-635 (RJ's room)


Thunder AF-685 (kids bathroom - chosen to compliment a fantastic blue/green back splash tile I have)


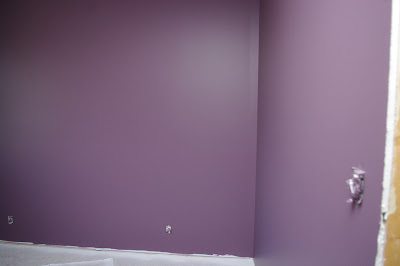
The drywall crew will start sanding the second floor tomorrow so after that I will bring my samples of paint (I painted chunks of drywall so I can move them around to the different rooms) and stick them in the rooms to see how they interact with the light.  The color I chose for the living room (overcoat) looks perfect with the stone for the fireplace and the curtains I have already purchased so I think we are going in the right direction!  Though the purple is not quite as bright as RJ wants, it also looks fantastic with the curtains I have for her room and a 2-canvas art set I have as well.  So, though I am still uncertain as to how everything will look when it is done, I think I am on the right track.  I want casual elegance with the ability to change the accessory pieces at will.  If I stick with grey walls, I can accent with deep purple or turquoise or fuchsia or pretty much any color I want.  I like that!  :)

I was also able to find the lights for the vanity area in my master bathroom so I am excited about that.  They were what I was looking for at the right price - even a 15% off sale that day!


SATURDAY - We were supposed to get a lot of work done in the basement today getting the rebar ready for the concrete pour on Wednesday morning but that never happened.  Jason ended up having some complications in one of the chicken barns and I woke up with an irritated eye.  We almost got all the Styrofoam laid out for the floor heat and Jay almost finished digging under the footing for the pipes for the geothermal system (should we go that route) but I felt really unproductive. 


My eye was bothering me enough that I really wanted to go home but stayed anyway.  I was certainly distracted and not motivated.  While we were down in the basement, the drywall crew was boarding the first floor!  It is really quite amazing the difference drywall makes.  We can no longer see through all the walls and in some ways that makes the place look smaller and in some ways it makes it seem bigger.  Whatever the case, it is coming along nicely.  They boarded the school room, living room (leaving off one section until the fireplace is installed on Tuesday), kitchen, dining room and entrance.  The rest of the main floor will be boarded after they finish sanding the upstairs early next week.
 
ENTRANCE

DINING ROOM

KITCHEN

LIVING ROOM

SCHOOL ROOM
SUNDAY - No, we did not do any work today but I thought I would share about my day anyway.  Before going to bed last night, my eye was really bothering me.  It felt like I had sand or a stick or something really scratchy in it all day.  I tried Polysporin Eye drops but that didn't help.  I tried an eye wash solution we keep on hand but that didn't help.  It was hard to fall asleep but I eventually did.  I was woken up by the pain around 5:30 this morning and I could not open my left eye at all.  It was so painful.  It was watering like crazy.  It was super sensitive to the light.  I was supposed to teach Sunday School in 4 hours and I couldn't see!  So, I woke up Jay and I talked about what to do.  I couldn't drive myself to the emergency room but we couldn't leave the kids by themselves either.  Eventually we decided to call Jay's parents and his mom came over.  I felt terrible about calling her since she helps us so much during the week but our options were slim.  Let it be said that they are the kind of grandparents we want to be when we get older - always available, no matter what.  So she came and we left with my eye watering all the way.  When we arrived we were admitted quickly since no one was there.  Once the doctor saw me he put a dye in my eye so he could look at it with ultra-violet light.  Turns out I have the herpes virus in my eye - you know, the same virus responsible for shingles or cold sores.  How it got in my eye, I will never know.  But it is causing an ulcer to form on my cornea, just beside my pupil.  It may feel like something is in my eye but there isn't.  He insisted we drive into the city to buy the anti-viral medication immediately (the town with the ER has no Sunday shopping whatsoever and in our town the pharmacy isn't open on Sundays) because if I delay treatment, I could have permanent scarring of my eye.  After he told me all that he gave me some drops to freeze my eye - the pain left immediately.  Then when he went to get the prescription, I started to feel ill.  My stomach felt funny and I didn't know what to do with myself.  He just returned with the paper when I practically passed out on the bed (had the bed not been there I would have hit the floor).  Well, he lifted my legs in the air and asked Jay to get the nurse.  Suddenly a bunch of people were in the room and lifting my shirt, checking my pulse and blood pressure (which had plummeted) and attaching the electrodes for a quick EKG.  Once they could get the electrodes to stay where they should and work, the results were normal.  Then they just waited for my pulse and blood pressure to return to normal before I was allowed to leave.  Why did I pass out?  I don't know.  It is not normal for me.  But the best place to do it is in a hospital, I suppose.  So, Jay and I headed into the city 45 minutes away and stopped at the nearest 24 hour pharmacy.  Turns out they didn't have the medication I needed.  On to the next one (we called first) and they had what we needed.  Then we headed home.  We walked in and Jay walked out to teach both the Sunday School class he was substituting for and he taught my class as well.  I went to bed while Jay's mom stayed to watch the kids.  As soon as Sunday School was over, Jay came home.  I slept away most of the day and stayed in dark rooms.  However, the eye drops I have to use every 2 hours when I am awake are really making a difference.  I still feel like something is in my eye but it is much more bearable.  I am not light sensitive and I can keep my eye open.  Every time I put those drops in it stings but after my eye feels just a tiny bit better.  Between those drops and the oral anti-viral I am taking, I am sure this will clear up quickly.  I do have to see my doctor in the next 3 days to ensure it is getting better or I will have to see aN opthamologist.  None of this was what I was expecting for today.  I was expecting to teach 4 delightful girls in Sunday School, have a lovely couple over for a delicious lunch meal, have a great nap in the afternoon and make crepes for supper.  None of that happened.  Well, we still had a good lunch but I was terrible company!  However, in spite of the curve ball thrown my way today, I am incredibly thankful for such amazing in-laws, for an understanding and loving husband, and a medical system that knew what it was doing and was able to do it quickly.  And now I am off to bed  - we will see what tomorrow brings.
Related Posts with Thumbnails