Thursday, May 31, 2012

Day 9 - Concrete Pour in ICF Walls

Since the concrete was only arriving early-to-mid-afternoon, I only arrived at the site just after lunch.  The guys had been there only a little bit before and were getting all the last minute details in place, like ensuring all the vertical rebar was installed correctly, all the window bracing was in place, all the extra bracing was in place and, should we need it, extra wood available in case of a blow-out.  The concrete pump truck was also getting itself set up and into place.  Then, just like that, Mr.W was pouring the concrete. 


He had the hose from the pump so he was pouring all the concrete in the walls, Jay was in charge of the vibrator, Mr.B was assisting Jay with the vibrator and my job was to supervise!  Actually, my job was to walk around the outside of the house while the concrete was being poured and watch to ensure no bulging was happening or no blow-out was about to happen.  Though I really didn't feel like I was doing anything, it was quite nerve-wracking.  I have never watched concrete being poured into an ICF wall before - the whole wall vibrates and shakes as the concrete enters it.  And why shouldn't it?  That concrete is entering it at a great speed and with much force - when it hits the insides of those walls, they are bound to move.  I was just not used to it.  As time went on, I gradually came to understand what was acceptable and what wasn't.  A little bit of concrete seeping out of tiny cracks here and there is to be expected.  The whole wall pushing itself apart isn't and might require additional bracing.  Though we did have to add a couple of pieces of extra bracing mid-pour, everything turned out just fine.  A rather uneventful pour, actually.  Just the way we want them.  I would say the only "excitement" was watching the extra-large concrete truck drive back and forth up and down the driveway, making bigger and bigger ruts each time and wondering if he was indeed going to get stuck.  Turns out he didn't but the driveway is a mess.  Again.


Mr.W poured concrete about 4' high the first time around the house and the second pass around he filled it up.  That allowed the bottom layer of concrete to set up a little and, therefore, help stabilize the walls. 


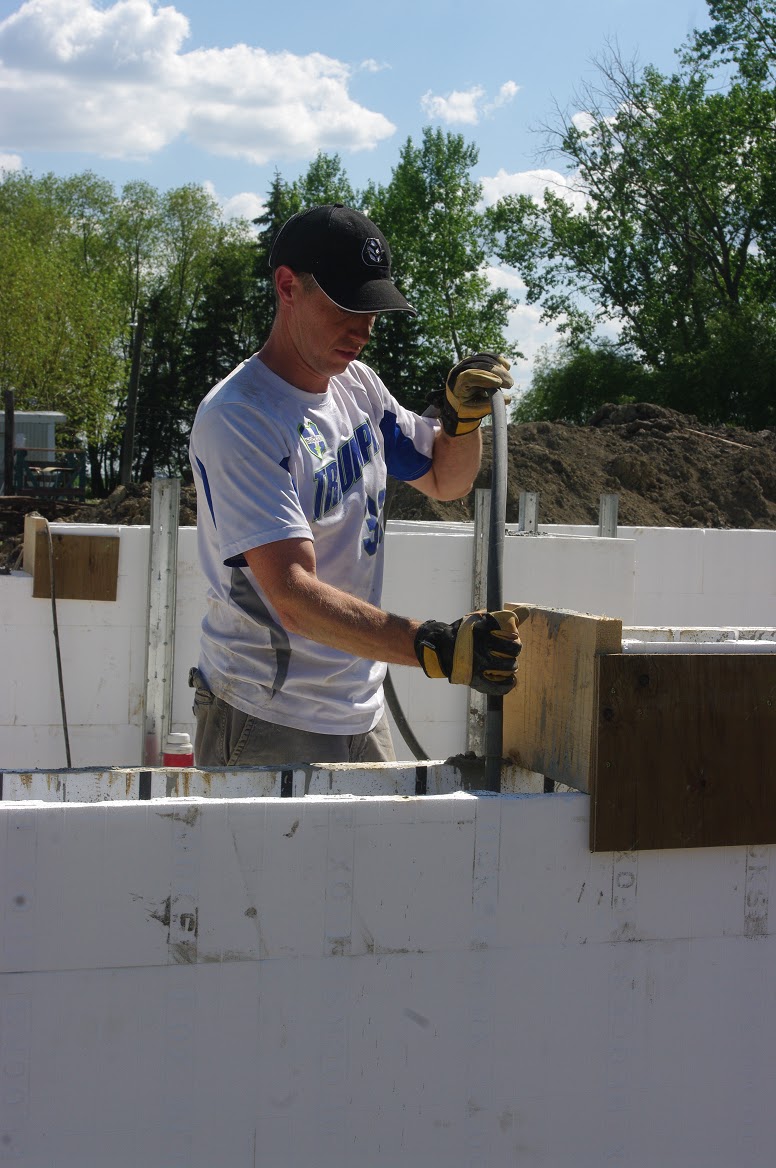
Jay's job was to vibrate the concrete around each window opening to ensure there would be no voids in the concrete and to vibrate ahead of Mr.W on the second pass around to ensure the "old" and "new" concrete would mix. 


Once the concrete had filled up the walls, my job was to scree the concrete.  It was super easy and reminded me of icing a cake! 


Once the concrete was screed, Mr.W set up his laser level to ensure the top of the wall was indeed completely level.  Jay went around and double checked that each wall was level on the top, not trusting the tops of the Fox Blocks but trusting the laser level instead. 


Mr.W also attached a pink string (I picked it up this morning and my choices were white, neon green and neon pink - I picked pink!) on the outside of the wall from one corner of the wall to the other so as to know how to adjust the bracing for the walls.  By turning on the yellow bracing rods on the inside of the walls, you can make the wall move forward or backward exactly where you want it.  You want that wall to be the exact same distance away from the string all around.  Then you have a perfectly straight wall. 


Finally, with the extra concrete, I quickly whipped up some very large rhubarb stepping stones before racing to pick up the kids and make it to soccer in time. 


Today for the first time since we started this project over a week ago, the kids stayed with grandma and grandpa so I could concentrate on the pour and not worry about them and what they were doing.  While I was away at soccer and getting the kids in bed, Jay continued to make stepping stones (15 more) and levelled the driveway as best he could from the HUGE ruts the concrete trucks left.  Now we are both exhausted.  Happy and exhausted!  We have basement walls!

Wednesday, May 30, 2012

Day 8 - Window Bucks & Inspection #1

At the end of the day today it was hard to see much difference from the end of the day yesterday.  But since we had worked all day we knew we did something.  One of my first jobs on this gorgeously sunshine-filled day was to vacuum.  Yes, I know, the house isn't even built and I am already vacuuming.  The guys were trying not to make quips about the woman doing the woman's work but somehow they slipped out anyway.  But instead of vacuuming the floors, I was vacuuming the walls. Inside the walls.  Since we had to trim some of the ICF blocks down to size, a bunch of shredded Styrofoam was sitting on the footings inside the walls.  That has the potential to cause seal issues between the footings and the walls and allow moisture through.  We want a good seal with no moisture seepage so I got to vacuum inside most of those blocks.  You remember the picture I showed of the inside of one of the blocks after it was filled with rebar?  Well, that leaves little room to vacuum but I made it work.


Since the walls stand 9'4" tall I first inserted an 8' piece of central vac pipe into the wall.  I attached the shop vac to the end of the pipe and sucked up all the Styrofoam garbage and other litter.  I removed the vac, removed the pipe and moved over 8" to do it all again.  Over and over and over again.  About 125' worth of it (since some of it stayed remarkably free of debris, I didn't have to do all the walls).  Needless to say, I was glad to be done!


While I was vacuuming, Mr.W and Jay were making these bizarre torture devices.  Or what appeared to be torture devices.  Actually they are the insides of the window buck.  A window buck is the framing that goes around the inside of the window openings.  The nails help the concrete to adhere to the window bucks better.  Isn't Mr.W so smart?  He should be, he is an award-winning carpenter!


Once those window bucks were installed, we needed to add bracing to the window openings.  When the concrete is added to the walls, the pressure on the walls and the window openings is huge.  We want the openings to stay the correct size so extra bracing is needed to ensure they are the perfect size for our windows.  (And, yes, it takes me about 2x as long to brace a window as it takes Mr.W but that is okay!)


While we were bracing the windows, the boys were chatting it up, discussing their new rooms and the window seats they would like to have.  Little do they know, it is already in the plans!


Though the kids spend a lot of time running around, climbing hills, digging holes and getting extremely dirty, the boys, especially, are incredibly helpful.  They often ask if there is anything they can do to help so we send them for drinks or for wood or tools or anything else they can do to help (and don't forget all the pictures they take while I am busy working).  We love that they want to help and they love that they can help.


Finally, we also needed to reinforce spots in the ICF walls.  There are certain areas where the blocks had to be cut to size and those areas are most prone to blow-outs (along with a few other areas) when the concrete is being poured in the wall.  Mr.W went around and sprayed those areas red - Jay commented that he felt like we had written a test and those were all the red pen markings saying it was all wrong!  Mr.W just smiled and said they weren't mistakes, just vulnerabilities!  So, Jay reinforced those vulnerabilities now while we are not panicking over blow-outs. 


So, after a productive day today, we only have a little more to do to be all ready to pour the concrete in the walls tomorrow afternoon.  And we even got the go-ahead from the inspector today - our first inspection and we passed!  Woot!  Woot!

Partying over here:

HookingupwithHoH

Somewhat Simple

  The DIY Dreamer

Tuesday, May 29, 2012

Day 7 - Finished the Fox Blocks!

We knew the rain was going to be with us for the majority of the day but we worked anyway.  It was a rubber-boots-and-toques kind of a day but when you are building your own house, who cares?  :)  Jay and the guys set up the support system for the Fox Blocks so that when I arrived around 11am, the scaffolding was up and they were working on the last couple of rows of blocks.  I jumped in to help and got to work cutting and placing blocks, just like we did last week.  Only this time we were working on the scaffolding instead of on the ground or on ladders.


Since we had to close up the wall we had kept open until now, Mr. W cut out one of the window openings and made a ramp to the dirt bank on the other side so we had some way of getting into these 9'4" walls.  The rest of the windows will be cut out tomorrow and the window bucks will be made.


Somehow, I ended up placing the very last Fox Block!


After all the blocks were placed and the final row of rebar was set, Jay went around the whole wall and added the vertical rebar every 16" or so.  Up until now we had been placing the rebar horizontally in every row of blocks but you must also have rebar running up and down the wall so Jay placed all those in the right spots.


With all the rain, everything was covered in mud, especially the kids!  However, the guys discovered that the cardboard used to package the Fox Blocks makes great mud-covering material!


Once again, it wasn't a very physically intense day but with the cold and the rain, it sure tires you out.  Then, finally, in the late afternoon, the sun shone and it was glorious.  At the end of the day, I could echo the words Pepe said as we were finishing up, "I cannot believe I get to live in this house!"


If you hover your mouse over this last image you will see how the wall has grown over the last 4 days!

Monday, May 28, 2012

More Items for the House

Today I didn't work at the house at all.  Jay was there for the morning but home all afternoon since I went on a date with my mom - lunch, pedis and shopping is a delightful way to spend a rainy afternoon (if it had been hot and sunny I might have thought more about being at the property, but since it was rainy, I hardly thought of it at all!).

In between all the work at the property and all the work here at home, I have been continuing to scour the Internet and fliers for the necessary items we need to finish out the house.  The past couple of weeks have proved to be productive as I have added the following items to our inventory.  Well, technically some are still waiting for me to pick them up and some are in shipment as I write but I have paid for them so they are mine!

We now have one of these for the island in the kitchen:


2 of these for the master bathroom:


1 of these for the master shower:


More of these for the doors:


And a few of these:


And these for the kitchen cabinets:


All rather lovely things that I look forward to seeing installed in the house!

Tomorrow we are back to work stacking blocks!

Saturday, May 26, 2012

Day 5 - "Wash, Rinse, Repeat" (Rows 3, 4, and 5)

Today we just continued where we left off yesterday.  Stack blocks.  Zip tie blocks.  Add rebar.  Repeat.


Some blocks need cutting down to size so that process is a little time consuming.  If we would have known what size the blocks were before we designed the house, we would have designed the whole part under the front entrance just a little larger so we wouldn't have to trim every block on every row in that section.  If you can use full-sized blocks, you save yourself a whole bunch of time and possible frustration.  We know that now but wished we would have known that then.  If you plan to design and build your own house, keep that in mind!!


Finally, Mr.W says we have one of the cleanest job sites he has worked at.  We have a secret for that.  This is what the kids do when they need some discipline.  Works quite well as they don't particularly enjoy it (therefore, it makes a great discipline tool) and we get a tidy job site!  Win, win!


At the end of today (today it was just us again) we have mostly completed 5 rows (part of the wall will remain unfinished until right near the end so we still have access to get in and out of the basement).  Since the basement is only 7 rows high, we are almost 75% done this part!  Though I would love to finish it quickly, my forearms especially are thankful for the day of rest we get tomorrow!


Related Posts with Thumbnails