Thursday, May 31, 2012
Day 9 - Concrete Pour in ICF Walls
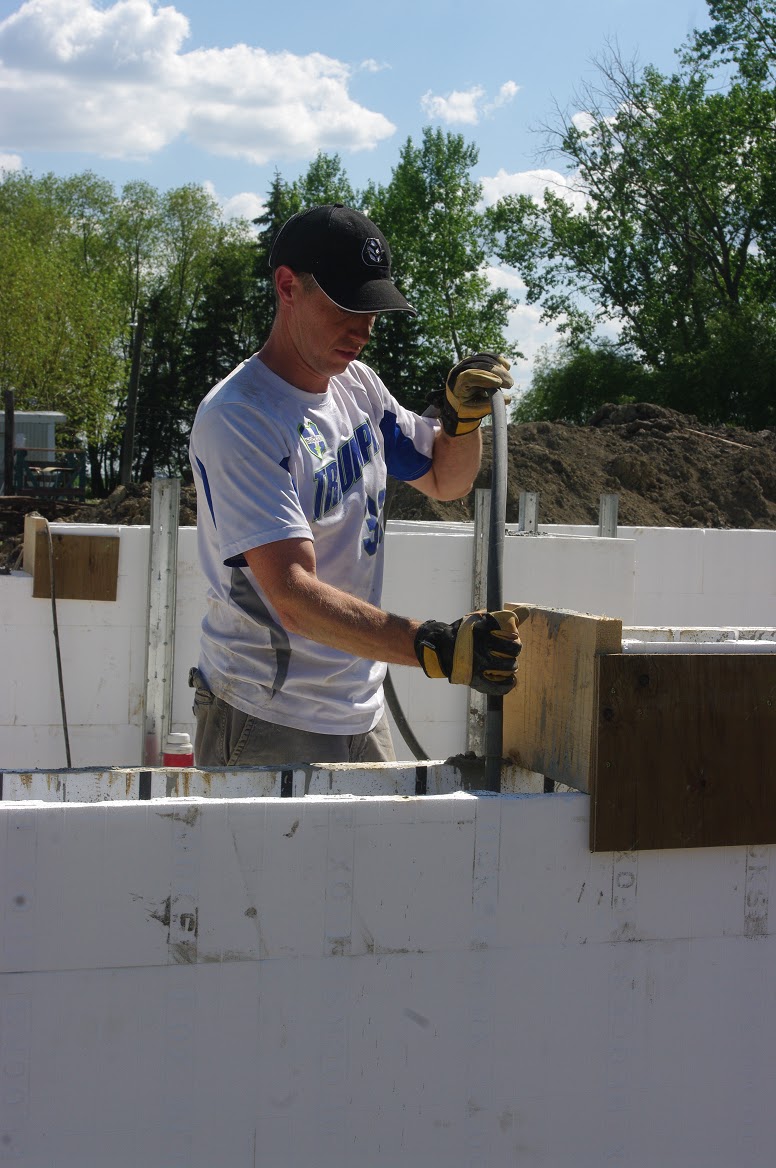
He had the hose from the pump so he was pouring all the concrete in the walls, Jay was in charge of the vibrator, Mr.B was assisting Jay with the vibrator and my job was to supervise! Actually, my job was to walk around the outside of the house while the concrete was being poured and watch to ensure no bulging was happening or no blow-out was about to happen. Though I really didn't feel like I was doing anything, it was quite nerve-wracking. I have never watched concrete being poured into an ICF wall before - the whole wall vibrates and shakes as the concrete enters it. And why shouldn't it? That concrete is entering it at a great speed and with much force - when it hits the insides of those walls, they are bound to move. I was just not used to it. As time went on, I gradually came to understand what was acceptable and what wasn't. A little bit of concrete seeping out of tiny cracks here and there is to be expected. The whole wall pushing itself apart isn't and might require additional bracing. Though we did have to add a couple of pieces of extra bracing mid-pour, everything turned out just fine. A rather uneventful pour, actually. Just the way we want them. I would say the only "excitement" was watching the extra-large concrete truck drive back and forth up and down the driveway, making bigger and bigger ruts each time and wondering if he was indeed going to get stuck. Turns out he didn't but the driveway is a mess. Again.
Mr.W poured concrete about 4' high the first time around the house and the second pass around he filled it up. That allowed the bottom layer of concrete to set up a little and, therefore, help stabilize the walls.
Jay's job was to vibrate the concrete around each window opening to ensure there would be no voids in the concrete and to vibrate ahead of Mr.W on the second pass around to ensure the "old" and "new" concrete would mix.
Once the concrete had filled up the walls, my job was to scree the concrete. It was super easy and reminded me of icing a cake!
Once the concrete was screed, Mr.W set up his laser level to ensure the top of the wall was indeed completely level. Jay went around and double checked that each wall was level on the top, not trusting the tops of the Fox Blocks but trusting the laser level instead.
Mr.W also attached a pink string (I picked it up this morning and my choices were white, neon green and neon pink - I picked pink!) on the outside of the wall from one corner of the wall to the other so as to know how to adjust the bracing for the walls. By turning on the yellow bracing rods on the inside of the walls, you can make the wall move forward or backward exactly where you want it. You want that wall to be the exact same distance away from the string all around. Then you have a perfectly straight wall.
Finally, with the extra concrete, I quickly whipped up some very large rhubarb stepping stones before racing to pick up the kids and make it to soccer in time.
Today for the first time since we started this project over a week ago, the kids stayed with grandma and grandpa so I could concentrate on the pour and not worry about them and what they were doing. While I was away at soccer and getting the kids in bed, Jay continued to make stepping stones (15 more) and levelled the driveway as best he could from the HUGE ruts the concrete trucks left. Now we are both exhausted. Happy and exhausted! We have basement walls!
Tuesday, June 21, 2011
A Family Affair


Wednesday, May 18, 2011
Not Bad For Two Hours of Work
BEFORE
AFTER
Wednesday, November 3, 2010
A Company I Love - Seeds & More
specializes in unique and quality seeds for garden annuals, perennials, shrubs, trees and tropicals. I have been ordering from Kim for a number of years already and love the service and the selection. Based in Newfoundland, Canada, I usually get my seeds in about 1 week and they come in these wonderful resealable packages. I usually order some seeds in the spring but this time I bought some maples and I am so excited to seed them this fall and watch them grow next year. A number of these are not hardy to zone 3 but I love to experiment and for the cost of seeds, it is a cheap way to do it. She always throws in a free package of seeds that is similar to what I am ordering but maybe just a different variety. I really love free things! Plus there is always a coupon for my next order. So, if you are looking for affordable annual and perennial seeds or looking to experiment with some more interesting or unusual plants, check out Seeds & More. I know you will love it, just as I do!
Tuesday, October 26, 2010
Progress at the Property
Once the trees were gone, we killed the grass in a large area, tilled it up, brought in some topsoil, and made a new flower bed 100' long and 50' deep, semi-circular in shape. The size of that one bed is larger than my current front yard, I believe! I bought 3 trees in the spring and planted them here, 1 12' Autumn Blaze Maple and 2 smaller Sienna Glen Maples. They will look fantastic as they grow and show off their red leaves each autumn! This winter I will plan the rest of that bed with the landscape design software I bought for $2 at a garage sale many years ago.
As soon as you drive onto our property, you notice the mature spruce trees lining the south side. They are beautiful trees but a little neglected. About the bottom 6' or so of the branches were completely dead. Dead branches do not look nice, especially on an evergreen. So, I took to cutting all those dead branches off the 15 or so spruce that form part of the perimeter of our property. That is a lot of branches! It was so worth the effort since it looks so much tidier. Right behind the spruce are a few more rows of trees/shrubs that need serious tiding but that has been put on hold as we tackle removing the trees where the new driveway will be, about 100' over from where it is now.
A bunch of the branches and trees that were pulled out were piled into the garden and somehow a little den was formed. The kids loved playing in there! Just imagine the big bonfires we will have as this is the smallest of a couple of piles!
Finally, this past Saturday, I made a tire swing for the kids. There were many tires kicking around when we bought the place and we have yet to take them away. So, what does one do with extra tires and perfectly arched willow trees? Create a tire swing, of course! That one event tired me out just trying to throw the rope over the tree. First I tried throwing the whole spool of rope but that was a little heavy and I wasn't getting it high enough. Then I found an old toilet seat lying in the leaves (seriously, the amount of garbage we have discovered is ridiculous!). I used just the bottom portion, tied the rope to it, and threw it like a disc or frisbee. It actually worked! I cleared out a large area below the swing of the stickes, leaves, large iron rods and other junk so that the kids would have a safe place to play. I mowed a path so even baby girl Ari can wander down there with no chance of getting hurt! With the amount of willows and tires on hand, I could make a swing for each of the kids and still have plenty to spare!!
I absolutely love working at the "new country", as the kids still call it. I love the quiet, peaceful feeling that comes over me. I love the possibilities. I love the fact all the kids can play outside with a lot less concern from me. I marvel at the nature God has created and am blessed beyond measure that we get to call this place home. Jay and I have spent many hours together working up a sweat and everytime I remember what a great team we make. I love that we get to make this place ours, together. When you have to put your blood, sweat and tears into it, it becomes even more special. And, I am thankful that it is raining this week so I can actually get some work accomplished here that has been seriously neglected thanks to the unbelievably amazing fall weather we have been experiencing. Seriously, it is October 26 and we still haven't experienced a "hard frost." -2C, -3C, maybe even -4C but that is it. I still have begonias blooming on the north side of my house! Very, very unusual and very appreciated. We don't take that for granted here on the prairies! Now, I just need to get the perennials from here dug up and transplanted over there! All in due time, right?!
Tuesday, June 8, 2010
How Does Your Garden Grow?
beans
peas
spinach
and lettuce.
I cannot help but be in awe of the God who makes things grow. It says that we plant and water and the Lord gives the increase. There is nothing I can do after planting but have faith that those little seeds will sprout and grow into something great, much like the way we plant the truth of God's word into the lives of our children. We can plant, we can tend, we can water but ultimately the growth occurs because of the Lord. What a leap of faith! What an exciting thing to see the seeds grow and blossom into something beautiful! So, how does your garden grow?
Tuesday, August 4, 2009
Absolutely intoxicating!
This Asiatic lily is one of the darkest you will find, even darker than this photo shows. It is called Landini and is a real beauty. I imagine a large quantity of these dark babies growing alongside white lilies for a black and white treat. Throw in some hot pink and you've got a knockout combination!
Asiatic lilies are the most reliable lilies - hardy in our zone 3 climate, they grow and bloom well each year with little attention from me. This speckled beauty is called DotCom and is currently growing alongside the Landini pictured above. They really do look great together.
But my absolutely favorite lilies would have to be the Orientals. Their intoxicating fragrance is absolutely divine! When I worked at a greenhouse a few years back, my favorite days were when all the Stargazer oriental lilies would bloom at the same time (imagine 50+ blooms!) - I was in pure heaven (while others would suffer migraines!). Oriental lilies are not the easiest to grow in zone 3 - I have mine nestled against my house on the south side to help ease the shock of our frigidly cold winters. Now, in a stroke of pure genius, someone decided to cross Oriental lilies with Trumpet lilies. Orientals smell fantastic and Trumpets are large (picture the large blooms of an Easter lily) - now you have something called OT lilies or Orienpets - really large, heavenly scented lilies. This is mine! Its name is Altari and it is magnificent! It wintered over really well and currently has 5 blooms open and 4 large buds waiting to burst. I HAD to cut this lily and bring it in - it is perfuming our entire upper level with its heavenly scent. If only I could download the fragrance as well as the photos! Guess you will just have to imagine!
Aren't they magnificent?
"Consider how the lilies grow. They do not labor or spin. Yet I tell you, not even Solomon in all his splendor was dressed like one of these." Luke 12:27 NIV