Showing posts with label J and I. Show all posts

Monday, February 18, 2013

A Few Snippets of the House

It has been a long while since I have posted but it is only because we are working hard to get the house completed this month.  I have put in long hours while Jay continues to work hard at all the jobs he has.  Progress continues to happen - some days more quickly than others.  Today there is a lovely blizzard happening here (well, not so much snow but such strong winds that it is blowing all the snow around - roads are closed so we are stuck at home) that I thought I would give you a quick photo update to show you the latest happenings.

Sealing the kitchen counter tops was top priority because so many things were riding on that decision.  It took many hours of research and fretting on my part but I finally decided to go with an epoxy-type sealer for the counters.  And I am SO glad I did!  I love how smooth and shiny it has made them.  Prior to sealing the exterior counters, I stained them black with the same stain I used on the basement and mudroom floor.  I was just not satisfied with the color the concrete was prior to that.  The stain really evened it out and gave me that contrast to the island counter top I was hoping for.  Once the counters were sealed, which was really not hard to do, I could finish up the tiling and grouting of the back splash and Mr. W installed the sinks and faucets.  I just love how it all turned out.  Once the back splash was complete, we re-installed all the lower cabinet doors and drawers and I attached some of the pulls and knobs as well.  The kitchen is really coming along nicely.


Our master bath is shaping up nicely.  The air massage tub we purchased about 1 1/2 years ago off Kijiji and the roman tub faucet I found for a steal at Liquidation World combine to make a wonderful addition to our bathroom.  They are all hooked up and functioning perfectly.  I have already had a bath in this tub and it.was.glorious!  I have since installed the casings on the windows.


The corner shower in our en suite is a lovely European thing that I haven't yet tried out.  It has many body jets plus a large rain shower head so it could be fun!  Mr.W installed a curved ceiling with lights above it to add some flare!  It just needs to be painted.


Jason worked hard on and off for a few days to complete this shelving in our main floor pantry.  This walk-in pantry is right next door to our kitchen and is going to be so lovely to use.  He says it looks kind of out of place since the rest of our house looks much fancier and this is just functional.  I am totally fine with functional!  It just needs a bit of touch up paint but other than that it is good to go!  We also installed a couple of base cabinets along with a butcher block counter on the opposite wall to create a sort of "butler's pantry" area - a place for the toaster, extra crock pots, food for when large groups are going to be coming over, etc.  I think it will come in very handy.  You can just see it on the right of the photo.


The big thing Jason and I worked on this past week was to install flooring!  We finished installing the flooring in the kitchen so we slide our range and our dishwasher into place.  I even used the oven for the first time.  Hopefully this coming week, we can move our full fridge/full freezer into place as well.  Then our kitchen will be completely functional.


Since the flooring in the kitchen was complete, it was time to move onto the living room.  Even though Jay was sick and spent time moaning on the floor, he stuck with the job and together we were able to finish the living room.  It looks so spectacular!  We love our flooring and hope it holds up really well.


And, as a final photo for today, I am not sure if I have ever shown you the panel detailing that is going up our main staircase.  Mr.W did all the work himself and it looks so lovely.  He also made our handrail and installed the newel post so now we just need the spindles.  I have stained the handrail but will add one more coat to darken the color.  As for the panelling, I have since primed it and it totally changes the look of the staircase.


And that is a glimpse of where the house is at today.  What do you think?

Wednesday, January 23, 2013

Pinspiration to Reality - DIY Coffered Ceiling

A long time ago, even before we started building the house, I would spend time online, figuring out the details of the house.  I loved looking at Houzz for all the beautiful homes and ideas it showcased.  It was often the place Jay and I could be found after the kids were in bed, figuring out how the staircase would work or what we wanted the kitchen to look like or a whole bunch of other things we needed to figure out.  It was actually a lot of fun to hear what he liked and what he didn't.  One time I stumbled upon a coffered ceiling (some people refer to these as box beam ceilings.  It is only a regional difference in name referring to the same thing) unlike any other and I pinned it on Pinterest.  It was stunning!  I knew that ceiling was going to be in my house!  It was written into the plans and I eagerly anticipated seeing it come to life.


Pinned Image
This is the photo I found on Houzz and pinned
Knowing that we would be building a coffered ceiling and not wanting to worry about finding a stud in which to attach the coffered ceiling, we covered the ceiling with OSB.  This allowed us to nail wherever we wanted, knowing we would always hit wood.  The OSB was then covered with drywall.

Even before the drywall began, I drew out the ceiling plan on the floor.  It is much easier to measure and mark on the floor then to measure and mark on the ceiling.  Then we just used a laser level later on to transfer those marks to the ceiling.  Easy peasy!!


After the walls and ceiling had the drywall in place, we were sure to build bulkheads around the exterior of the living room to define the area of the coffered ceiling as well as define the living room area itself (plus hide some heating ducts).  Our main floor is an open concept plan so this was a great way to separate the rooms without adding walls.  Instead of using wood to create the framing for the bulkheads, we used metal angle brackets.  They were simply long piece of  "L" shaped aluminum.  It was easy to attach them where we wanted.  We needed to add small pieces of 2x4's for strength and backing for drywall but it was much easier doing it this way than using all wood.  I did most, if not all, the framing of the bulkheads in the living room by myself, it was that easy.


Once that was done and the drywall was installed on the bulkheads, 2x6s were attached to the ceiling in the location of the "beams".  These would create the base for the coffered ceiling detail and is the wood to which all other pieces were attached.

After the 2x6s were in place, we used cardboard to figure out the depth we wanted the beams to be. 


Once that was determined, we removed the cardboard (obviously!) and went to work adding all the MDF to the sides of the 2x6s, creating the sides of the beams.  Additional MDF was added to create the bottom of the beams.  Then extra pieces were added on the sides to create inset areas similar to what is found on our fireplace.  Mr.W got us started, putting on the first piece or two with Jay.  Then Jay and I did the longer pieces and then Jay left me to do the rest of the ceiling by myself.  Mr.W thinks that since I come up with these great ideas, I should be the one to make them.  (Read that to say: I come up with all these intricate, takes-a-lot-of-work-and-are-a-pain-to-do-but-look-really-good details so he "lets" me do them!)


The most time-consuming and frustrating part was to follow.  Panel moulding was installed in each inset area on the sides of the beams.  I did about 1/2 of it on my own one evening before Mr.W (the builder/carpenter we hired to make sure we build the house right) gave me a couple of tips on how to do it even better the next day.  The second half of the job looked so much tidier and tighter.  After filling and painting, they practically look the same but I am much happier about the job I did on the second day.


Once all the wood work was done and all the nail holes were filled and sanded and the rest of the MDF edges sanded, the ceiling was given a good coat of paint.  And, voila!  The coffered ceiling I imagined since before we started building the house!  It really is spectacular and worth every minute of work it took!  This is our forever house, Lord willing, and we wanted to take the time to make it special.  We think we accomplished just that!


There, now if I can build a coffered ceiling, you can, too!  It really isn't that hard - just takes a lot of patience!  What do you think?  Did we accomplish what we set out to do and make a coffered ceiling just as nice as the one that inspired me?

Partying over here:

More the Merrier Monday

The DIY Dreamer


DIY Show Off

Monday, January 14, 2013

The Makings of a Traditional Fireplace - Mantle, Surround and Hearth


This is a DIY project to the max!  We even built the house the fireplace is in!  :)


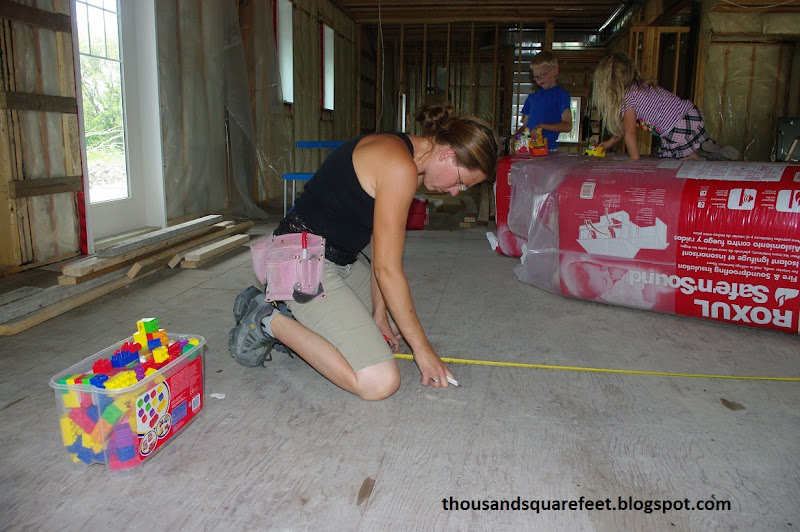
Raising the chimney chase walls themselves, way back in June of 2012

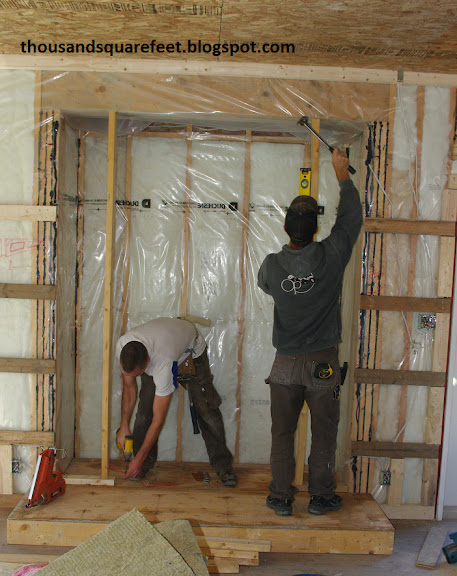
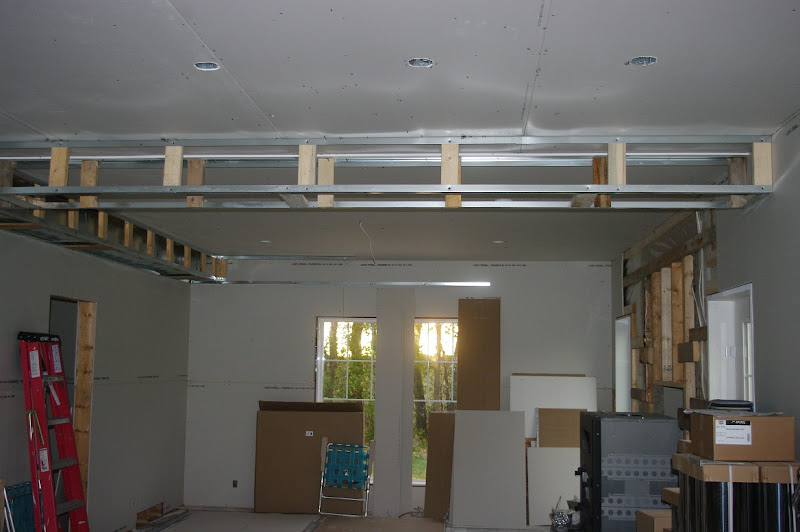
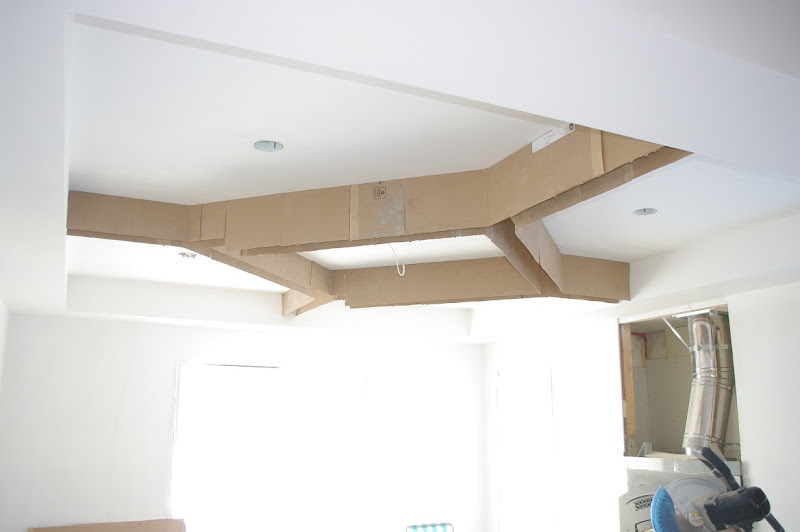
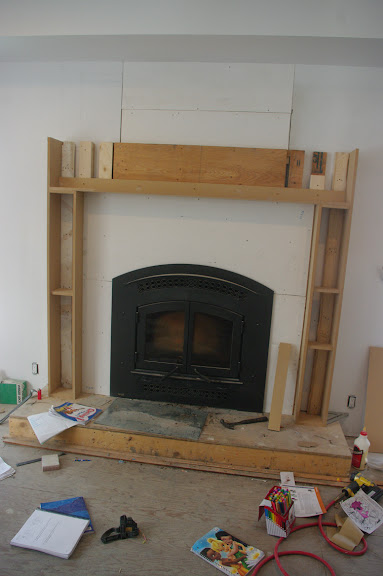
Framing out the fireplace opening

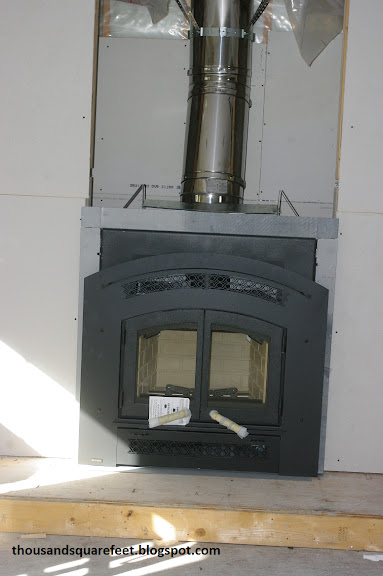
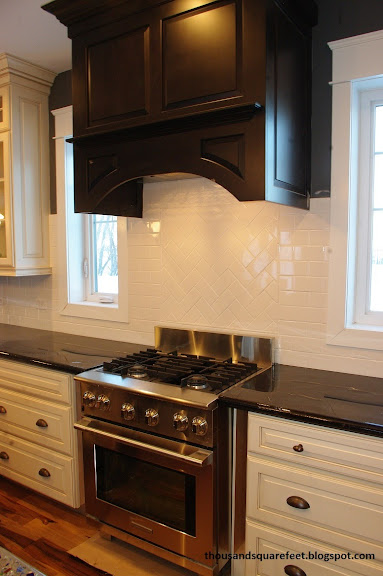
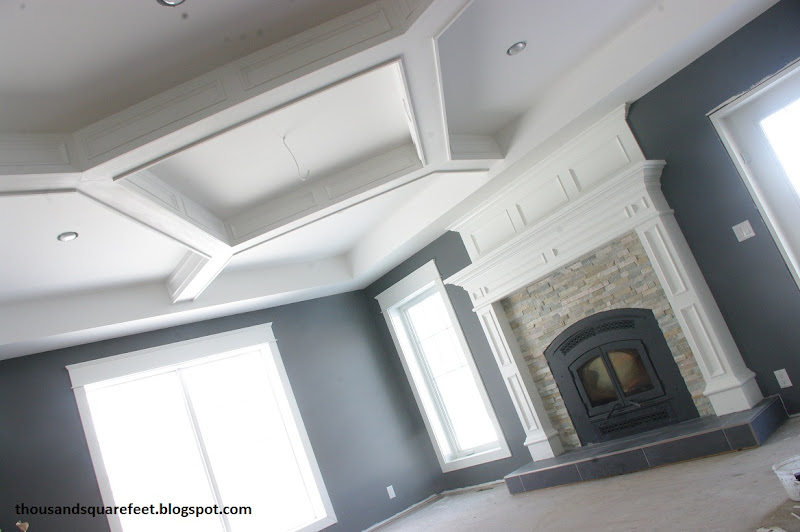
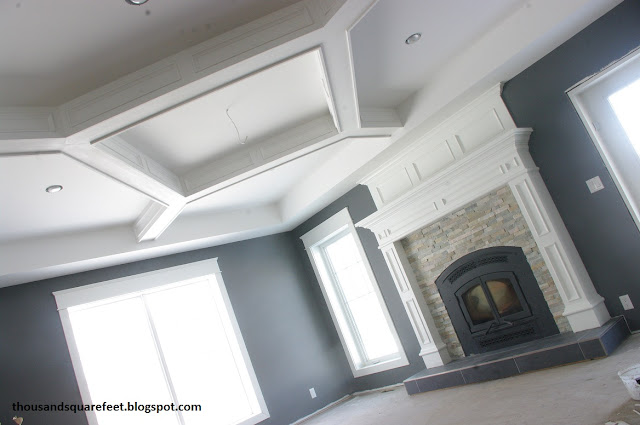
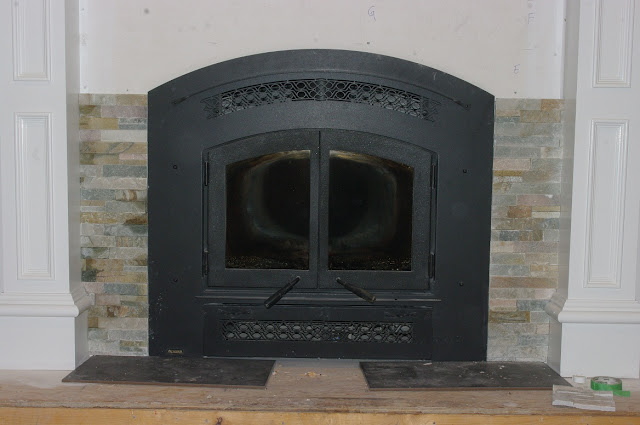
Fireplace is newly installed
The decision to have a wood-burning fireplace in our new home was a no-brainer.  I love the sound of a fire crackling in the hearth, I love the warmth the fire gives and I love the coziness it provides to a room.  We did bat around the idea of a gas fireplace for a little while but when we learned that a wood-burning fireplace would not increase the cost of insurance for our house one little bit, wood-burning it was.  Then it came time to figure out what kind of fireplace we needed and wanted.  Jay wanted it to be a source of heat for the house and it needed to be efficient and put out a lot of BTU's.  He told me which companies to pick from, I picked the ones I think looked the prettiest from those companies and then he ultimately chose the one that would be the best for our home.  Then it was time to figure out what the mantle, surround and hearth was to look like.  I knew I wanted a traditional look and feel to the fireplace.  I am not much for a modern look, preferring the comfort of traditional styling.  I scoured the web for inspiration photos and sent them off to Mr.W to give him the idea of what I wanted (for those of you visiting for the first time, Mr.W is our carpenter/builder guy we have hired to help us build our home.  He works alongside us most days making sure the house gets built right.)  I still have those photos attached to that email but since I didn't record their source, I won't share them with you.  Then came time to frame out the fireplace opening.

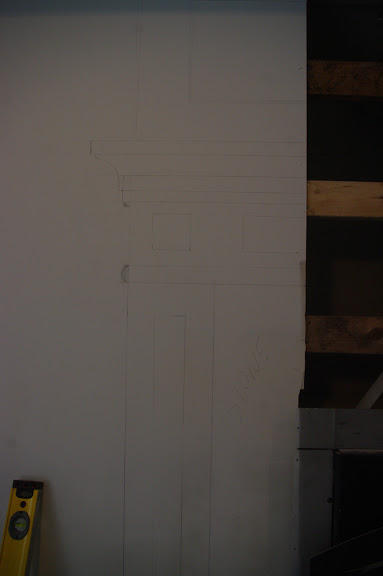
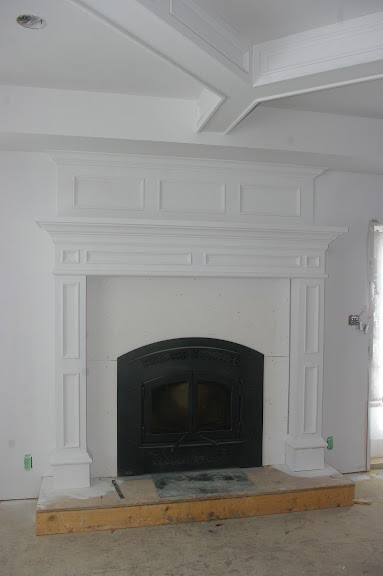
Before any work started on the actual surround, Mr.W drew out his idea on the wall.  I was so excited after seeing that drawing!  Not only did the drawing help us to agree on the design, it also gave Mr.W a reference point once the building of the surround began.  Once that was done, Mr.W adding back framing here and there to make sure there was something to nail the MDF to when making the actual surround.


Then came time to cut the MDF.  What a dusty process!  He added pieces here and there and the surround started to take shape.  Along the way, we talked together about how we wanted it to look, what size mouldings to use and numerous other little details that would affect the final outcome.  While Mr.W did the majority of the wood work on the surround, I did add most of the panel moulding on the surround myself. 


Then it was time to paint.  Obviously, that was preceded by lots of sanding of the MDF and filling of all the nail holes.  Then I painted a few coats of Distant Grey by Benjamin Moore, the same white we are using on all the trim in the house.  I added Floetrol to the paint to increase the working time and hopefully avoid brush marks.  Though it looks pretty good from a distance, I will still go over a couple areas again just to get it a little smoother.  Once it was all painted, it was time to add the stone.


I had seen this stone months earlier at Costco and thought it could be a nice fit for the house but wasn't sure on the price.  I told Jay about it and we decided to think about it a little.  Once we determined it was not only a good look but a fantastic price, I went back 1-2 weeks later to get some and it was all gone!  Ack!  I wanted that stone.  So, we decided to keep our eyes open elsewhere but nothing jumped out at me.  Then, a long while later, while at Costco, they had the stone in stock again!  So, we quickly did a mental calculation and popped a bunch of (very heavy) boxes in the cart.  I was giddy! 

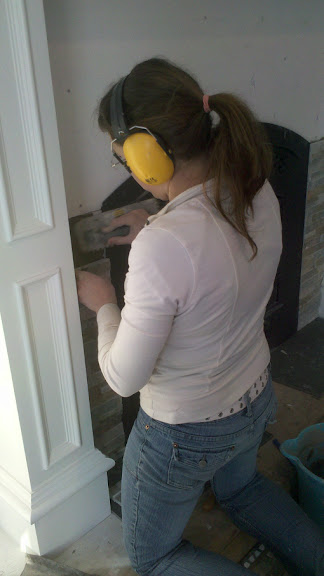
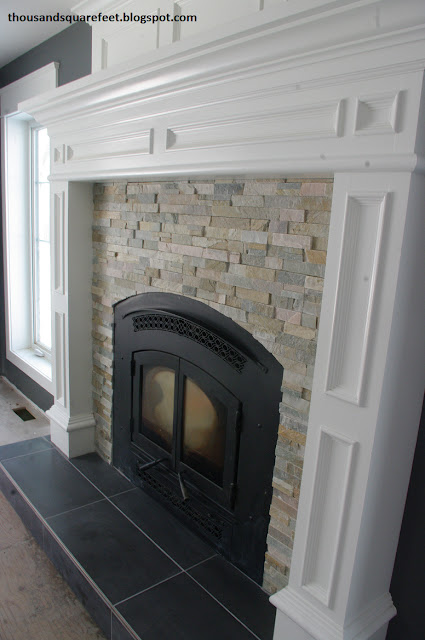
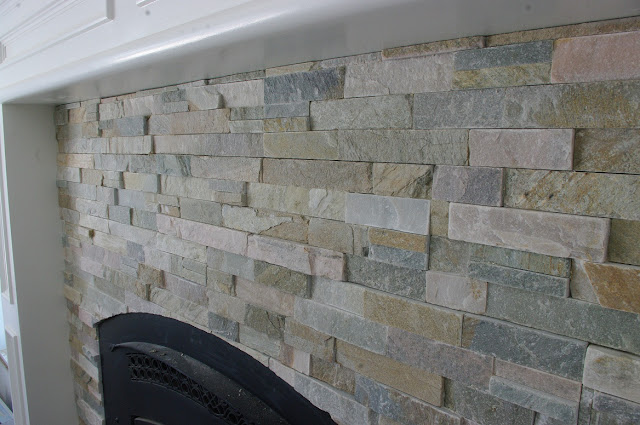
It was my job to do the stone work on the surround and I was quite okay with that.  This stone comes in long rectangle strips made up of a bunch of little stone pieces glued together.  Since the pieces are all different colors full of shades of greys, whites, pinks, oranges, browns and beiges, I pulled out all the pieces from the many boxes we bought and laid them out on the floor.  Then I picked all my favorite pieces based on the color composition.  I then arranged those pieces into the approximate shape I needed, marking which parts of the stone I would keep and which parts I didn't want.  It took a little time initially but once it came time to cut the stone, it was much quicker for having figured it all out beforehand.  The rest of the uncut stone I will repack and return to Costco.  (They have a fantastic return policy!)


The stone cuts really well with a wet tile saw but you sure do get wet! 


I started at the bottom of the surround and cut those pieces.  Once both sides had their pieces cut, I mortared them in place. 


Since we were attaching the stone to cement board, there was no need for lathe.  We just used mortar applied to the surround and back buttered on each stone to set them in place.  I did the sides up to where the fireplace starts to curve. 


Then I went back to cutting and dry-fitting each stone in place.  Whoever had the idea of a curved fireplace is a little insane!  It takes so much longer to cut one curved piece of stone than many straight pieces.  And if you know anything about tile saws, you cannot cut a curved shape.  It takes lots of kerf cuts and some grinding with a rotary tool and lots and lots and lots of patience!  BUT I did a fantastic job, if I do say so myself!  I eventually had all those pieces of stone cut and mortared in place and the result is beautiful!


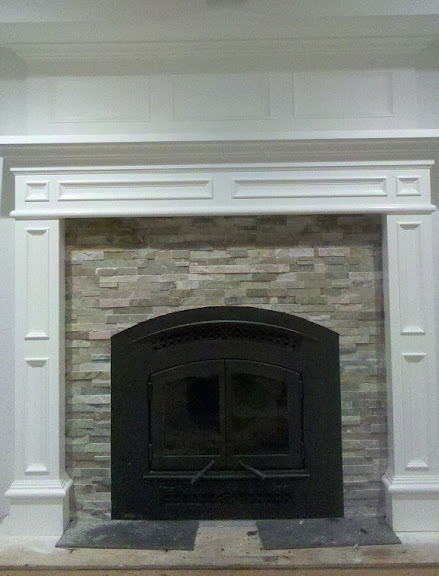
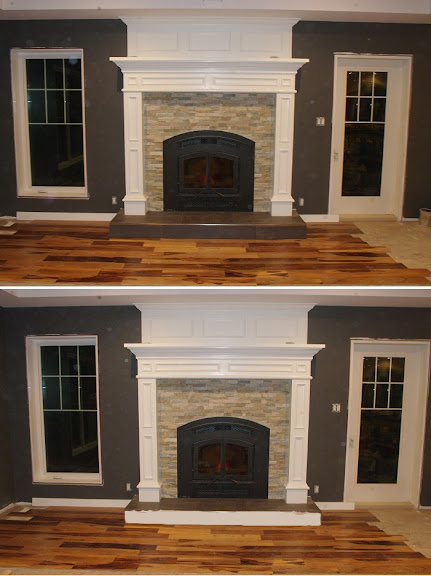
Then came the whole "what color tile for the hearth" debate.  I was quite sure the dark grey tile was what I wanted.  I saw it in stock at the local hardware store, walked by it many times each morning when I had to pick up something or other and finally thought that was the one I wanted.  It looked perfect with the stone, drawing out the grey.  But once I had the stone in place and finished cutting most of the tile, something looked off.  I took a photo and didn't like what I saw. 


I couldn't change the stone - it was mortared in place.  I refused to change the flooring since it is the most perfect floor ever so it was the tile that needed to change.  Thankfully Mr.W suggested I paint the walls before doing anything else.  I did that and suddenly the tile worked. 


There was some suggestions to paint the front of the hearth white but after some photoshopping and some photos, it was dark all the way. 

I finished cutting the last few remaining tiles and then mortared those in place, leaving 1/8" space in between for grout.  The grout ended up being a little lighter than I expected but I like it anyway!


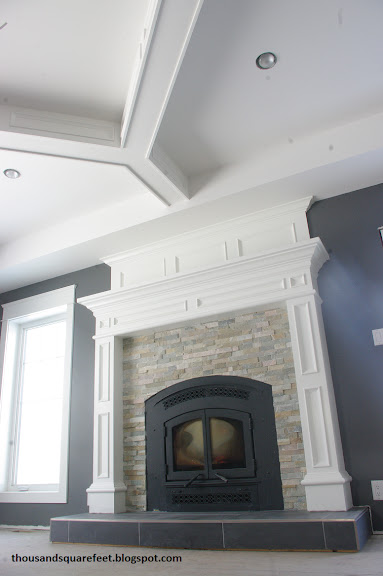
Some of you may see that the mantle is quite tall.  I have a hard time reaching the mantle while standing on the floor.  The fireplace required a certain amount of non-combustible material around it.  That is the stone.  But I really loved the look of a large and chunky mantle.  Yes, I know that it will be a bit of a challenge to reach the mantle for decorating or a challenge to find stuff to put up there but I love the look and am so glad we did it this way.  A smaller, shorter mantle just would not have done this room justice!  And besides, even without any decor up there, it looks stunning!


This fireplace has been the best investment ever!  It throws a lot of heat and is our primary heat source while building.  True, our geothermal is all hooked up but if we turn it on during construction, we void the warranty.  So, until we move in, it is this fireplace and 2 small space heaters that are keeping a 2-storey house (3600 square feet) at a comfortable 60F.


I look forward to adding our new leather sectional to this room and hanging out with the whole family!  We just gotta finish this room (and the rest of the house) first!

Thanks for stopping by!  I would love to hear what you think of our work. 

Partying over here:

More the Merrier Monday


DIY Show Off

The DIY Dreamer
Related Posts with Thumbnails